This article was prepared with AI assistance based on an analysis of the current Lumina Studio source code, existing Wiki content, and relevant workflows. It has been checked against the current version, but omissions or details that become outdated may remain as the software evolves. If you find an error or have a clearer explanation, example, or suggestion, please leave a comment on this page or propose an edit on GitHub.
Upload, Replace, Crop, and Rotate an Image
If you remember only the essentials:
- click the upload area or drag files into it for the first import;
- Replace current image stays in the single-image workflow, while Add more images enters Batch mode;
- cropping keeps only the selected area; rotation changes orientation; neither can create detail that is absent from the source;
- after the image changes, old colour edits, Preview data, and generated downloads no longer describe the current image. Preview and Generate again.
The screenshots below come from the current English Lumina Studio interface. The demonstration graphic exists only to make orientation and crop boundaries obvious.
Preserve the original before editing
Lumina works with a cropped or rotated task copy and does not intentionally overwrite the source file on disk. Even so, keep the original separately. A browser task is not a file archive, and a refresh, expired session, or accidental replacement can remove temporary state.
For important artwork, keep at least:
- the untouched source image;
- a prepared working copy with the intended canvas and orientation;
- the final settings or Share Card recipe;
- the final 3MF after verification.
Step 1: upload an image
In Core Settings, click the dashed upload area or drag an image onto it.
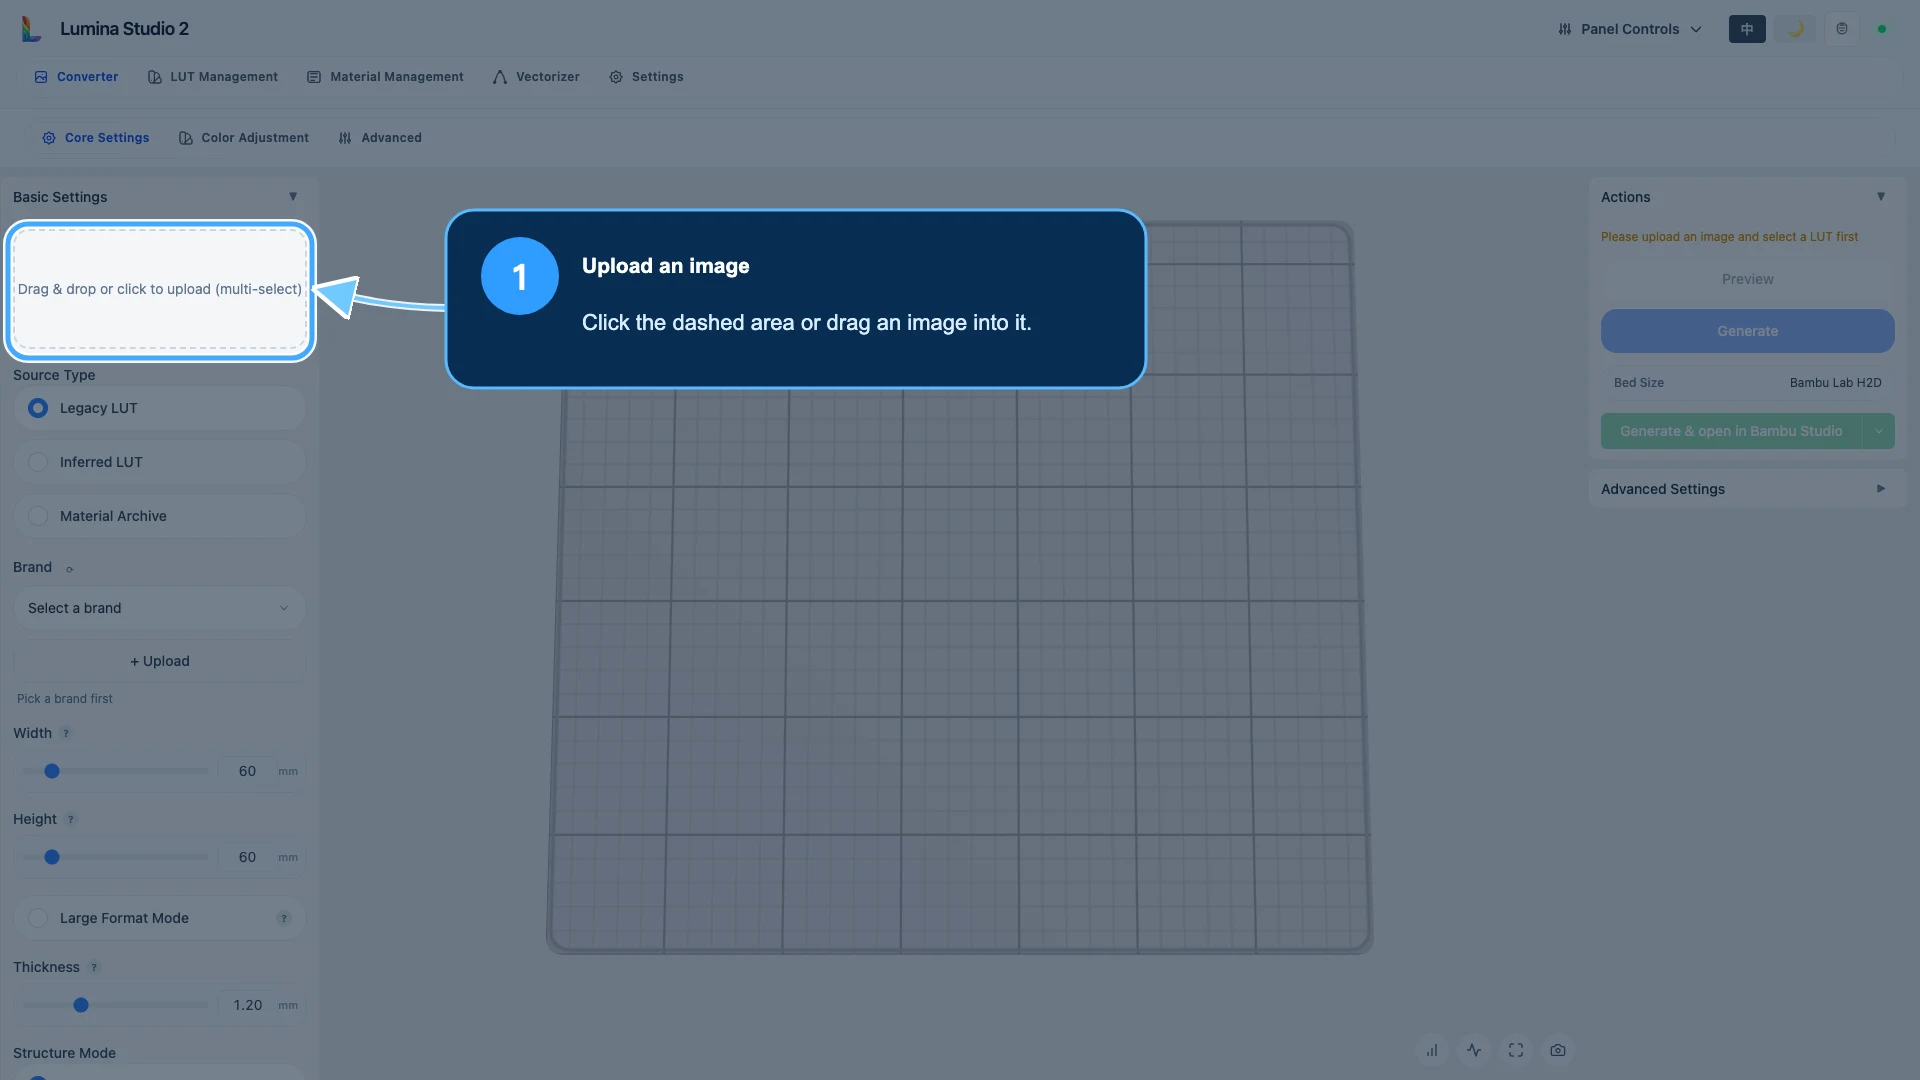
The upload area accepts multiple files. Selecting one file starts the single-image workflow. Selecting several files starts Batch mode immediately.
If nothing happens, test a small JPG or PNG that opens normally on your computer. This separates a source-file problem from a broader connection or service problem.
Step 2: crop after upload
When Crop After Upload is enabled, a raster image opens in the crop dialog after selection. Drag the blue boundary, or choose a common aspect ratio, and verify the selection dimensions before confirming.
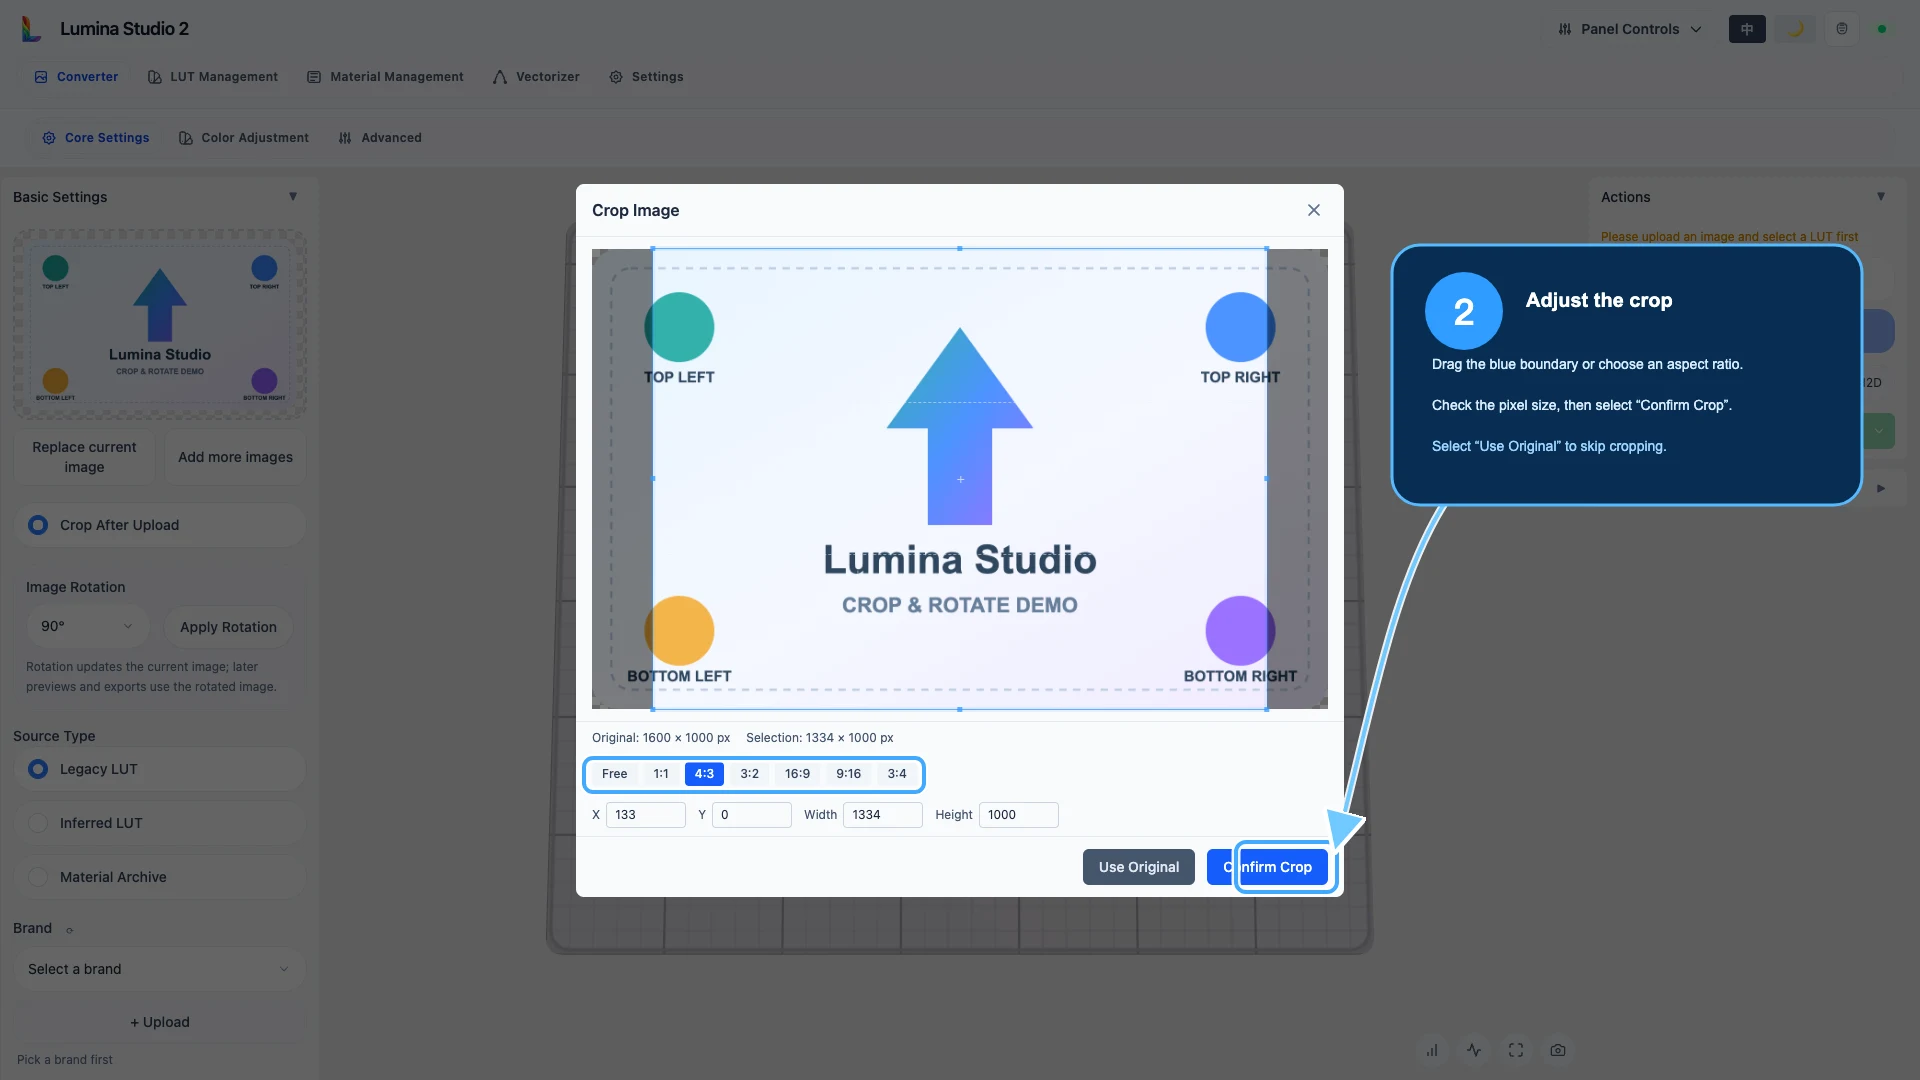
Use:
- Confirm Crop to keep only the selected area;
- Use Original to keep the complete uploaded canvas;
- the close button to cancel the current dialog without treating that as a successful crop.
Cropping is destructive to the task copy: pixels outside the selection are unavailable to later Preview and Generate steps. It does not resize missing detail back into the image.
Leave margin around transparency and soft edges
Transparent PNG shadows, anti-aliasing, and soft outlines can consist of nearly invisible semi-transparent pixels. If the crop boundary touches only the solid-looking edge, the finished model can lose part of the glow or outline. Leave a small margin, then compare the Preview.
Why might SVG skip this dialog?
Native Vector uses the SVG canvas and path geometry rather than raster cropping. Fix
its viewBox, page size, off-canvas objects, and geometry in a vector editor. See
SVG Troubleshooting.
Step 3: replace the image or add more images
After one image is loaded, two controls appear below its thumbnail.
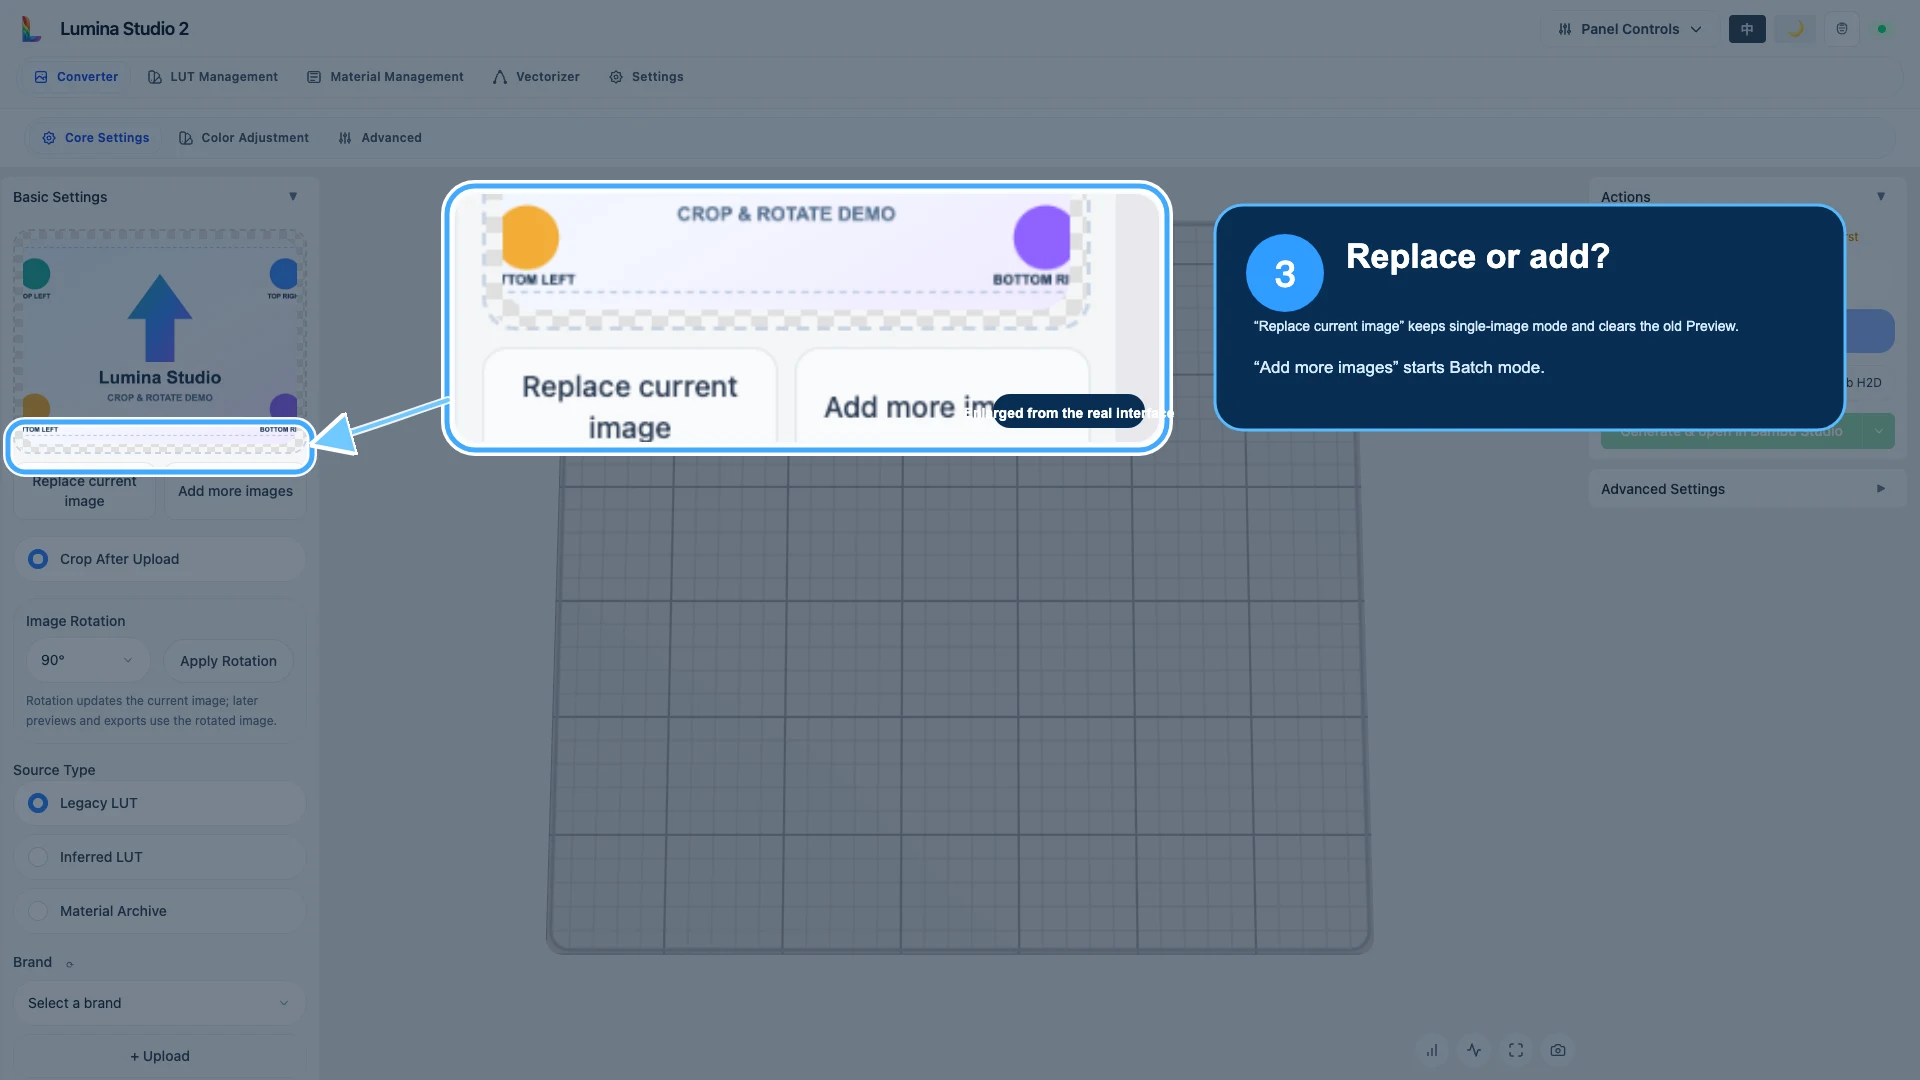
Replace current image
This removes the current task image and imports another while remaining in the single-image workflow. Existing Preview data, Color Workstation edits, and downloads are cleared because they cannot be transferred safely to a different source.
Clicking the thumbnail can also open the replacement file chooser.
Add more images
This retains the current image, appends one or more files, and switches to Batch mode. The files then share one set of primary conversion settings. Batch is not suitable when every image needs a different crop, orientation, Source Type, or structure.
If you intended to replace but now see a file list and Batch Generate, you entered Batch mode. Remove unwanted files with the × beside each name. Keeping only one file returns to the single-image workflow.
Step 4: rotate the current image
In the single-image workflow, Image Rotation provides 90°, 180°, and 270°:
- 90°: one quarter-turn clockwise;
- 180°: upside down;
- 270°: equivalent to 90° counter-clockwise.
Choose the angle, then select Apply Rotation.
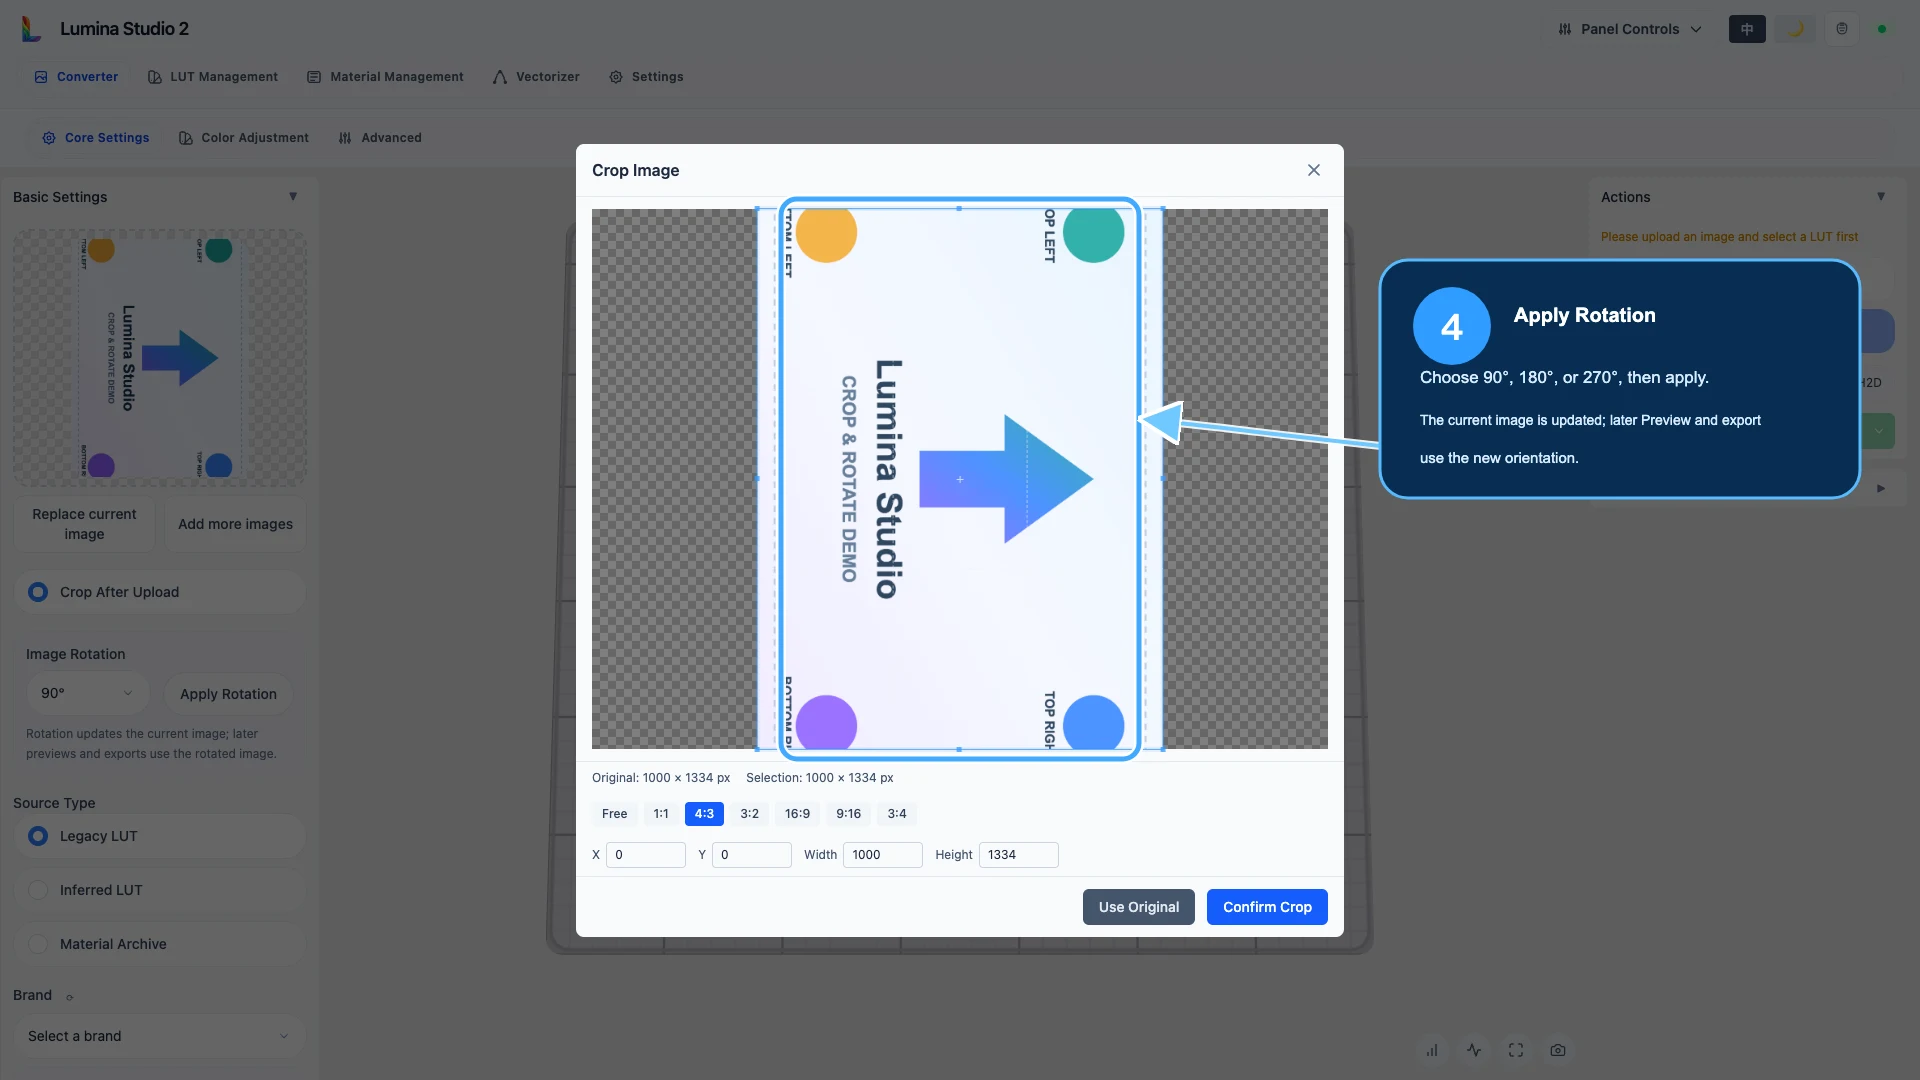
Rotation updates the task image. Later Preview, 3D, and export use the new orientation, and previous generated files are stale. A 90° or 270° rotation also swaps width and height, which can change the final composition at the same target width.
If Crop After Upload remains enabled, the crop dialog can open again after rotation. This is not a duplicate upload; Lumina is asking you to confirm the new canvas. Select Use Original if no additional crop is required.
canvas, or low-resolution detail.
Step 5: inspect the Batch file list
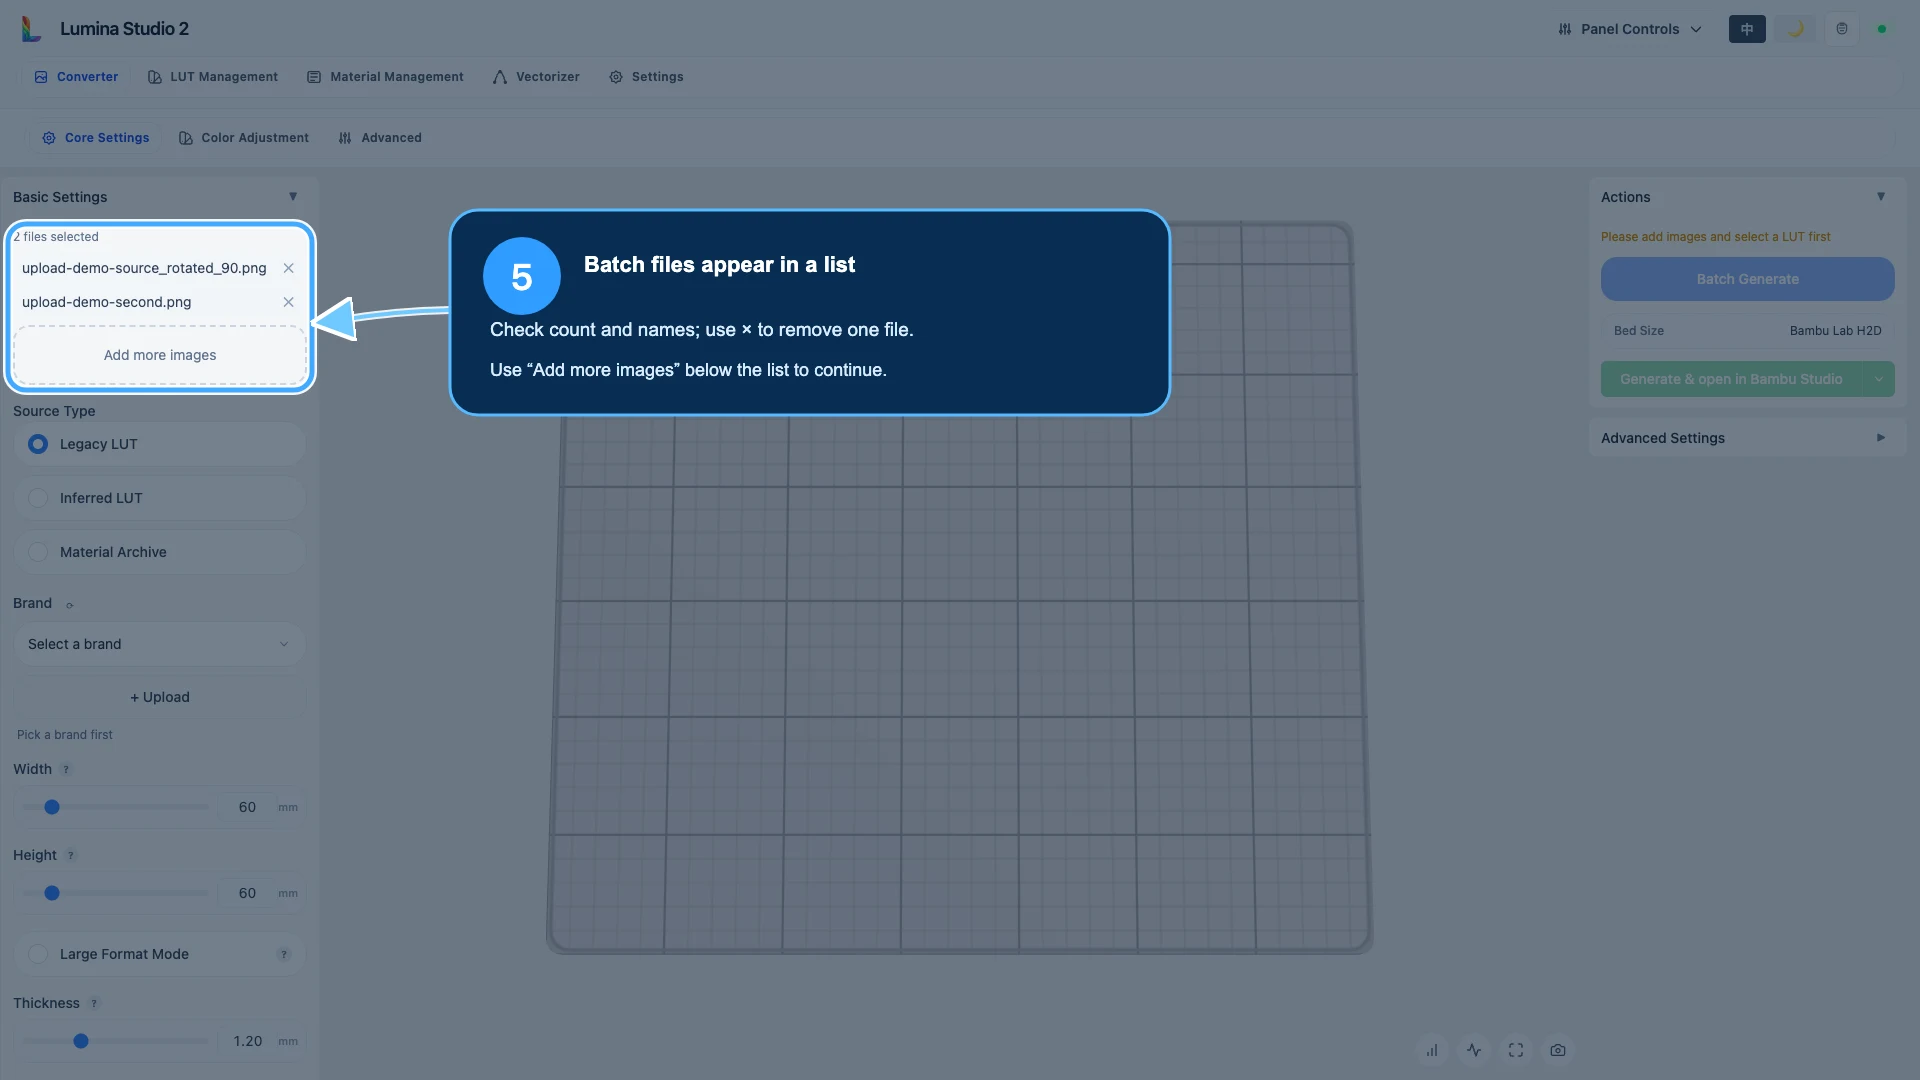
Before setting shared parameters, confirm:
- the displayed file count matches the intended Batch;
- no file is duplicated or the wrong revision;
- each × removes the expected file;
- newly added files appear in the list.
Use Add more images under the list to append files. Batch mode does not expose an independent crop and rotation workflow for every file. Prepare each working copy first, then add it to the Batch.
What resets after the image changes?
| Operation | Current image | Workflow | Old Preview and downloads | Next action |
|---|---|---|---|---|
| Replace current image | Replaced | Single image | Cleared | Check crop, Source Type, and settings; Preview again |
| Confirm Crop | Uses the selected area | Single image | Cannot represent the new canvas | Check composition and Preview |
| Apply Rotation | Uses the rotated copy | Single image | Cleared | Confirm the new crop if needed, then Preview |
| Add more images | Retained and appended | Batch | Single-image result cleared | Check the list and shared settings |
| Remove a Batch file | That item is removed | Batch while more than one remains | Batch result becomes stale | Confirm the remaining list and Generate again |
Cleared temporary results do not mean that a source file was deleted from disk. They mean the old task result no longer applies to the new image or file list.
Common questions
Why did the crop dialog not appear?
Check whether Crop After Upload is enabled. Batch mode does not open a separate dialog for each file, and SVG does not use the raster crop workflow. In a single-image raster workflow, enable the switch and use Replace current image to import again.
Why did rotation open the crop dialog again?
The rotated result has a new canvas. With Crop After Upload enabled, Lumina asks you to confirm it. Select Use Original if no further crop is needed.
Can two 90° rotations make 180°?
Yes, but selecting 180° once is clearer and avoids an unnecessary intermediate task state. Every applied rotation invalidates the previous Preview.
How do I leave Batch mode after entering it accidentally?
Remove unwanted files until only the intended single file remains. Check filenames carefully so you do not remove the one with edits you planned to keep.
Why did a transparent edge lose a thin ring after cropping?
The edge probably contains semi-transparent pixels. Re-import the original and leave a small margin outside the visible solid edge.
The image direction is right, but the model still faces the wrong way
Confirm the thumbnail and 2D Preview first, then inspect Structure Mode, display surface, model orientation, and print-facing surface in the slicer. Image rotation and model placement are separate settings.
Why is there still no thumbnail after upload?
Try a small known-good JPG or PNG. If that also fails, follow The Page Will Not Open, Keeps Spinning, or Generation Fails to check the connection, file, and service stage separately.
Image notes and content licence
The operation images are real captures of the current English Lumina Studio interface. The “Crop & Rotate Demo” graphic was created for this Wiki page. The captures contain no personal files, account information, browser address bar, or local path.
Unless otherwise noted, the original text, demo graphic, and focus annotations are available under the Wiki’s CC BY-NC-SA 4.0 content licence.
Supported formats, control names, and Batch behaviour can change. Treat the current interface, Preview, and generated result as the final authority.
Submit feedback
Your feedback is sent privately to the Wiki maintainers and is not displayed publicly on this page.