This article was prepared with AI assistance based on an analysis of the current Lumina Studio source code, existing Wiki content, and relevant workflows. It has been checked against the current version, but omissions or details that become outdated may remain as the software evolves. If you find an error or have a clearer explanation, example, or suggestion, please leave a comment on this page or propose an edit on GitHub.
Image Import, Batch Selection, Crop, and Rotation
The first Converter input determines the artwork used by Preview, colour matching, and model geometry. Select files through the picker or drop them onto the upload area. Once an image exists, the uploader collapses to one row and can be expanded again by selecting the filename area.
Accepted artwork
Converter accepts:
- JPEG, PNG, SVG, and WebP;
- HEIC and HEIF;
- DNG, CR2, CR3, NEF, ARW, ORF, RW2, RAF, PEF, SRW, and generic RAW;
- Lumina
.lumina.jsonproject files.
RAW, HEIC, and HEIF depend on the backend's available decoder. When the current environment cannot decode the file, convert it to PNG or JPEG first. SVG follows vector-input handling and does not automatically open the bitmap crop dialog.
Single image, add more, and batch mode
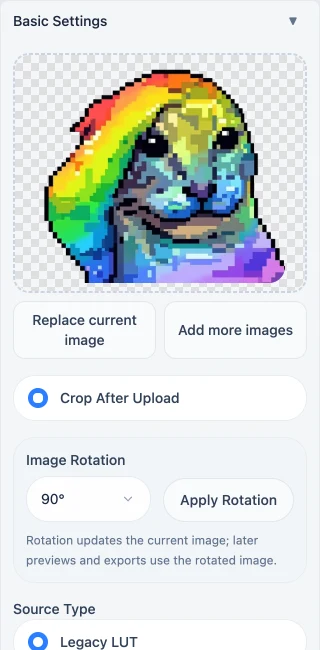
With one ordinary image, the uploader shows the current Preview and offers:
- Replace current image: replace the image in the current task;
- Add more images: append files and enter a batch task.
Batch mode lists files and allows additions or individual removal. It renders up to 40 filenames directly and reports the remaining count. The single-image crop switch is not shown in batch mode; prepare each input's framing and orientation before adding it to the batch.
When exactly one .lumina.json or Lumina recipe PNG is selected, the uploader routes it through
project import before ordinary image handling. A PNG without valid embedded recipe data remains an
ordinary image. See
Share Card and JSON: Export, Import, and Continue Editing.
Crop after upload
When Crop after upload is enabled, selecting a new single bitmap opens the crop dialog. Turning the switch off affects future selections; it does not recover pixels already removed from the current image.
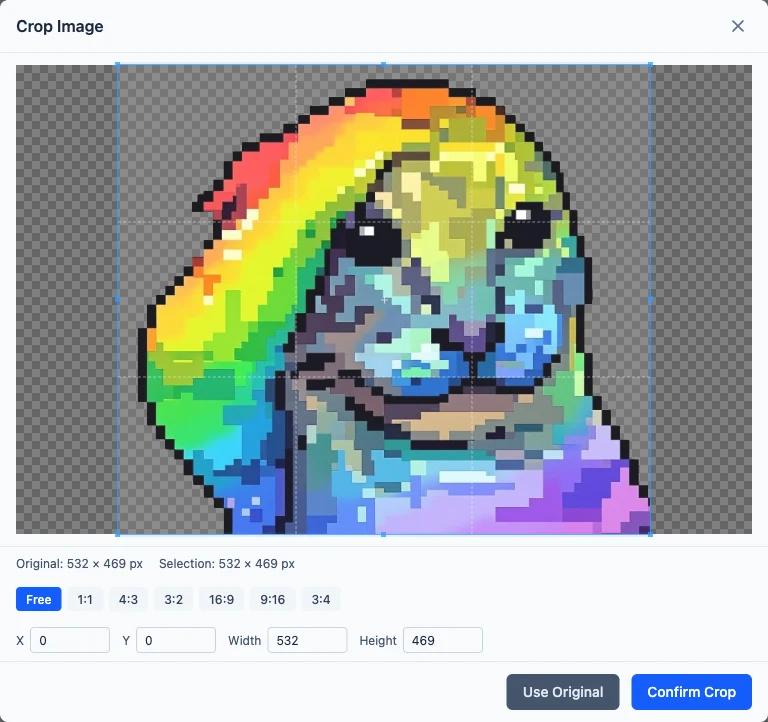
The dialog provides:
- free ratio;
1:1,4:3,3:2,16:9,9:16, and3:4;- original and selected pixel dimensions;
- pixel fields for
X,Y, width, and height; - Use original and Confirm crop.
Dragging the crop box and editing fields stay synchronised. The selection is constrained to the
source image. Confirming replaces the current task's image, Preview, and aspect ratio with the
cropped result. Esc, Close, or Use original does not submit the current crop.
Image rotation
The selector offers 90°, 180°, and 270°. Select an angle and then choose Apply rotation;
changing only the selector does not alter the image.
Applying rotation creates a new current image and updates its aspect ratio. Later 2D and 3D Preview, colour matching, share card, JSON, and 3MF use the rotated result. Repeated rotations operate on the current image rather than applying a temporary browser transform.
Check after changing the image
Replace, crop, and rotate operations make the previous Preview stale. Run Preview again and check outline, orientation, transparency, layer images, and target dimensions. For a complete walkthrough, see Upload, Crop, and Rotate an Image.
Submit feedback
Your feedback is sent privately to the Wiki maintainers and is not displayed publicly on this page.