This article was prepared with AI assistance based on an analysis of the current Lumina Studio source code, existing Wiki content, and relevant workflows. It has been checked against the current version, but omissions or details that become outdated may remain as the software evolves. If you find an error or have a clearer explanation, example, or suggestion, please leave a comment on this page or propose an edit on GitHub.
Material Archive Source
Material Archive uses individual filament profiles measured from gradient cards and saved in the material library. You can combine measured spools freely and let Lumina Studio solve their layer recipes instead of reading recipes from a fixed LUT.
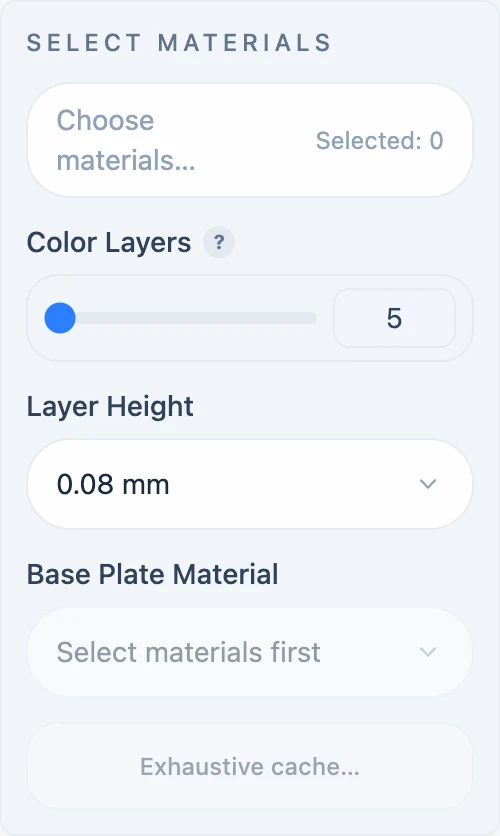
Select Materials
The confirmed list order becomes the material-slot order used by recipes. Adding, removing, or reordering materials invalidates the old preview. Lumina Studio can reconcile renamed material directories, but it does not silently substitute an unrelated profile when one is missing.
Colour Layers
The UI offers 5–10 layers, while the generation schema accepts 1–20. This value is the number of print layers available to each pixel recipe, not the number of selected spools. A five-spool set can still produce a ten-layer recipe because a material can be repeated.
More layers increase the recipe search space, model height, and solve cost.
Layer Height
The current UI offers 0.04, 0.08, and 0.10 mm. Layer height changes the optical contribution of every layer. A profile measured at 0.08 mm should not be assumed to describe 0.04 mm behaviour; the profile and solver validation remain authoritative.
Base Plate Material
The base-plate material must be one of the selected materials. The request stores its index in the current list. If that material is removed, Lumina Studio infers a new default rather than retaining an invalid index.
Exhaustive cache
Exhaustive cache… becomes available after at least one material is selected. It builds a persistent, exact recipe library for the active combination. Its identity includes:
- the selected materials and their order;
- colour-layer count;
- layer height;
- substrate;
- the Lab-grid density selected in Settings.
Changing any of these values queries a different cache rather than reusing an incompatible result.
A ready cache reports build time, file size, occupied cells, mean and maximum ΔE, and build duration. View colour charts loads the cache's Lab/RGB distribution. Rebuild replaces the cache for the same key, while Delete cache removes only the file for the active combination and grid density.
If no exhaustive cache exists, the current conversion path searches saved smart recipe caches from the largest available budget down. If none exists, it builds a temporary runtime cache capped at about one million candidates. This keeps preview available, but bounded candidate coverage is not equivalent to full enumeration.
Smart Recipe Cache
Smart Recipe Cache is intended for material sets whose complete recipe space is too large to enumerate. It saves a broadly distributed candidate set under a fixed budget instead of claiming to cover every possible order. The UI offers approximately 1M, 4M, 8M, 32M, and 64M candidates; 32M is the default.
A larger budget generally gives broader coverage but increases build time, disk use, and peak build memory. The status area reports the saved recipe count, budget, file size, build time, and inverse-refinement state. View recipe coverage displays the candidate distribution in colour space.
Exhaustive and smart caches do not overwrite one another. A matching exhaustive cache takes priority; the smart cache is used only when an exhaustive one is unavailable. Neither cache repairs inaccurate material measurements or changes the layer-order and optical models.
Submit feedback
Your feedback is sent privately to the Wiki maintainers and is not displayed publicly on this page.