This article was prepared with AI assistance based on an analysis of the current Lumina Studio source code, existing Wiki content, and relevant workflows. It has been checked against the current version, but omissions or details that become outdated may remain as the software evolves. If you find an error or have a clearer explanation, example, or suggestion, please leave a comment on this page or propose an edit on GitHub.
Color Workstation
After a successful preview, open Color Adjustment to enter Color Workstation. It is not a separate project: the 2D view, palette, and available-colour panel all read the active preview session, and confirmed edits are written back to that same session.
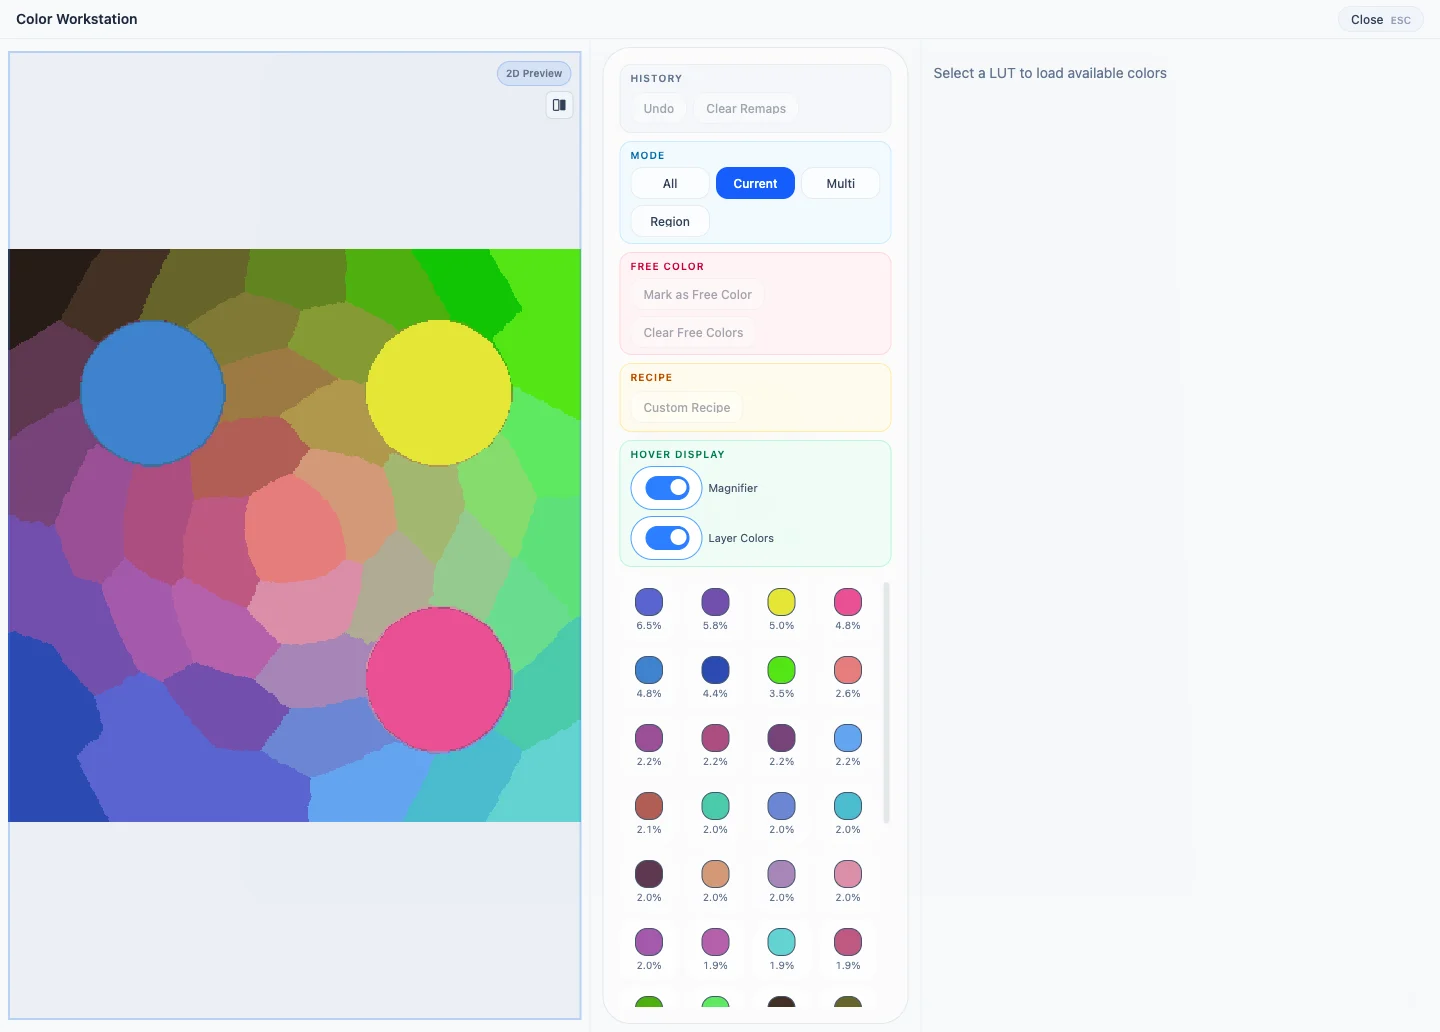
The three areas
- 2D preview: inspect the result and click a colour or connected region to edit it.
- Palette: review colours used by this preview, their coverage, selection mode, and edit history.
- Target colours: a traditional LUT shows its colour library; a material archive shows colours achievable by the selected material set.
If an image exists but no preview has been created, opening the workstation attempts a preview automatically. When the image, colour source, or required parameters are incomplete, the panel stays empty instead of reusing data from an older session.
Where edits are kept
A confirmed replacement first updates the active 2D and 3D previews. Generate then uses those edits to create the 3MF.
Closing the workstation or pressing Esc only returns to the 3D viewer; it does not undo confirmed edits. Recheck the
palette after replacing the image, colour source, or preview session.
Related pages:
Submit feedback
Your feedback is sent privately to the Wiki maintainers and is not displayed publicly on this page.