Generate and Print Gradient Calibration Cards
AI translation notice: This English tutorial was translated from the original Chinese tutorial with AI assistance. The English narration and subtitles were also produced with AI assistance. If any wording is unclear, please refer to the Chinese tutorial or leave a comment.
This tutorial takes you from Lumina Studio to a printable pair of gradient cards. Both cards use the same test filament for the stepped colour blocks. The only difference is the base: one card uses white, and the other uses black.
When you finish, keep the two printed cards together with the complete ZIP package downloaded from Lumina Studio. The next tutorial, Extract Gradient Card Data, needs that exact pair and its matching ZIP.
Video tutorial
If the player does not load, watch the complete tutorial on YouTube.
What you will make
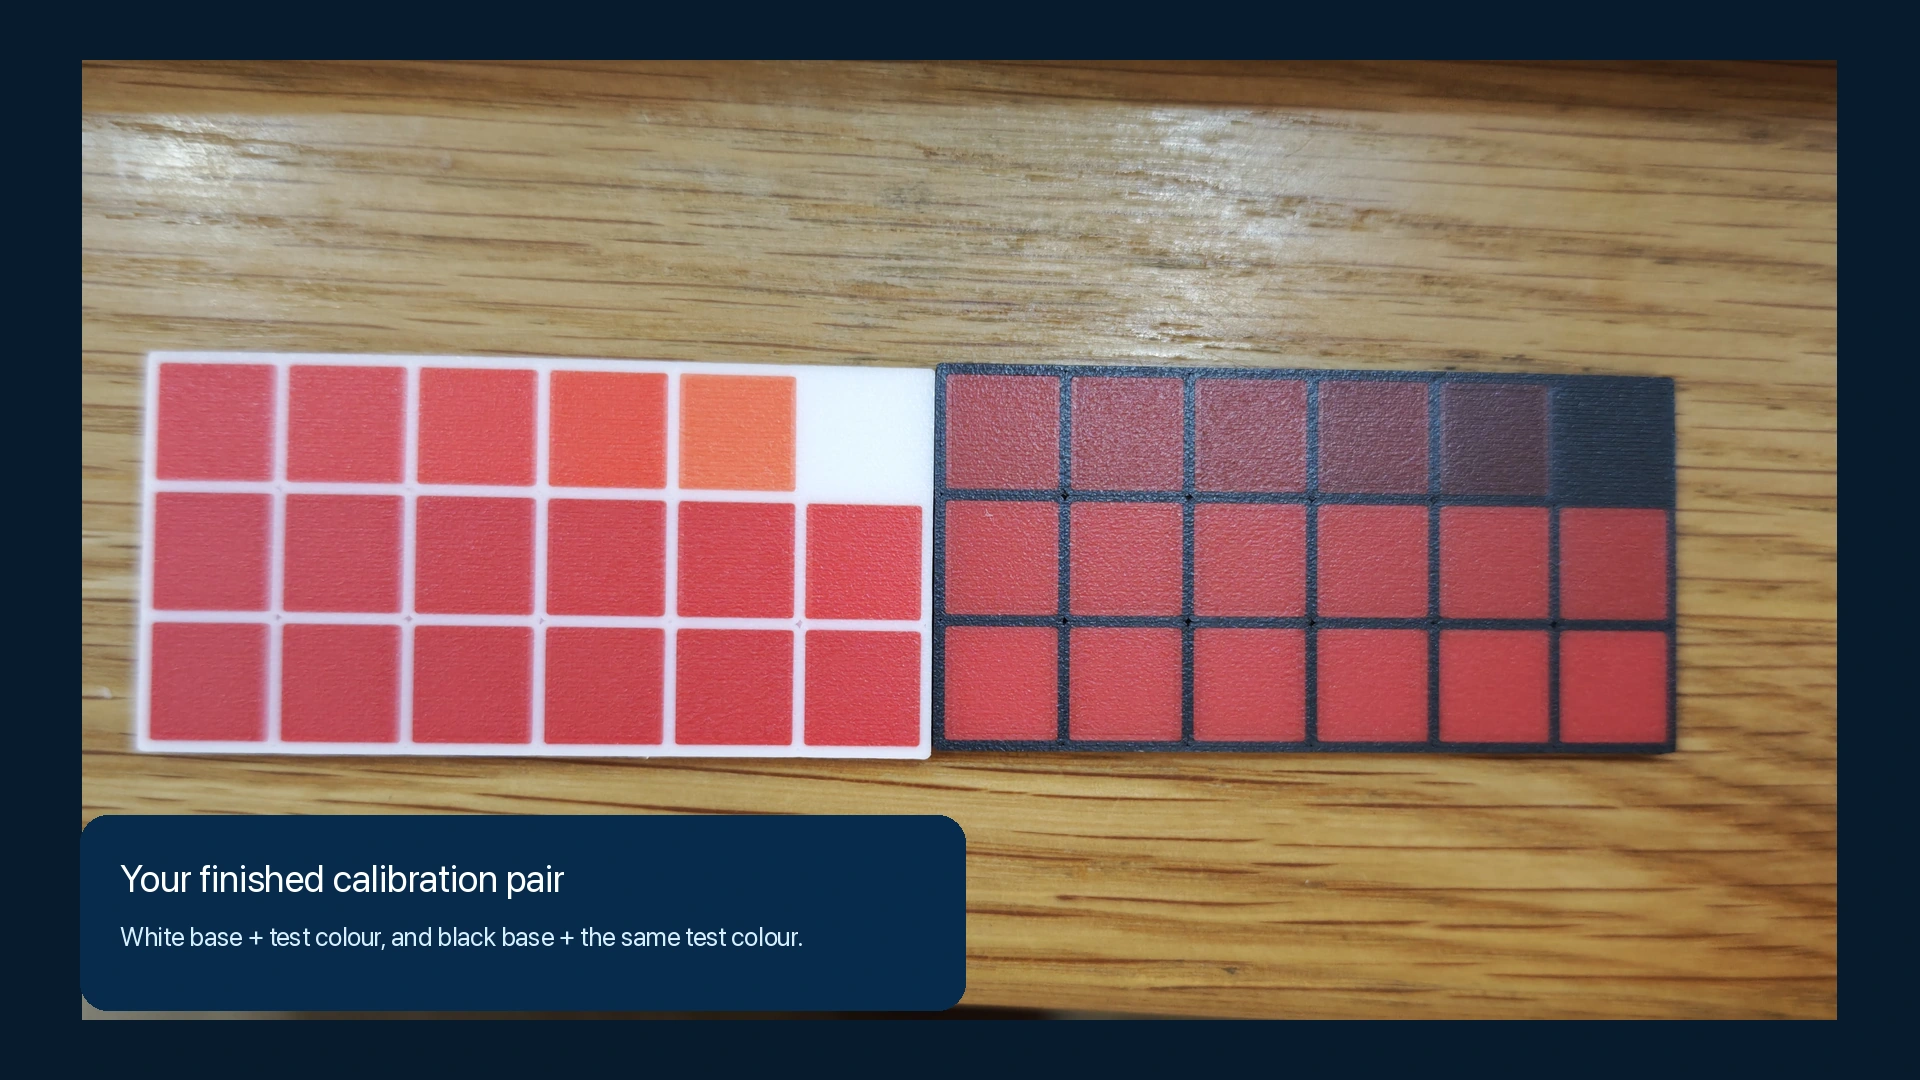
Every test filament needs two cards: one with a white base and one with a black base. The stepped colour blocks on both cards must use the same spool of test filament.
Before you begin
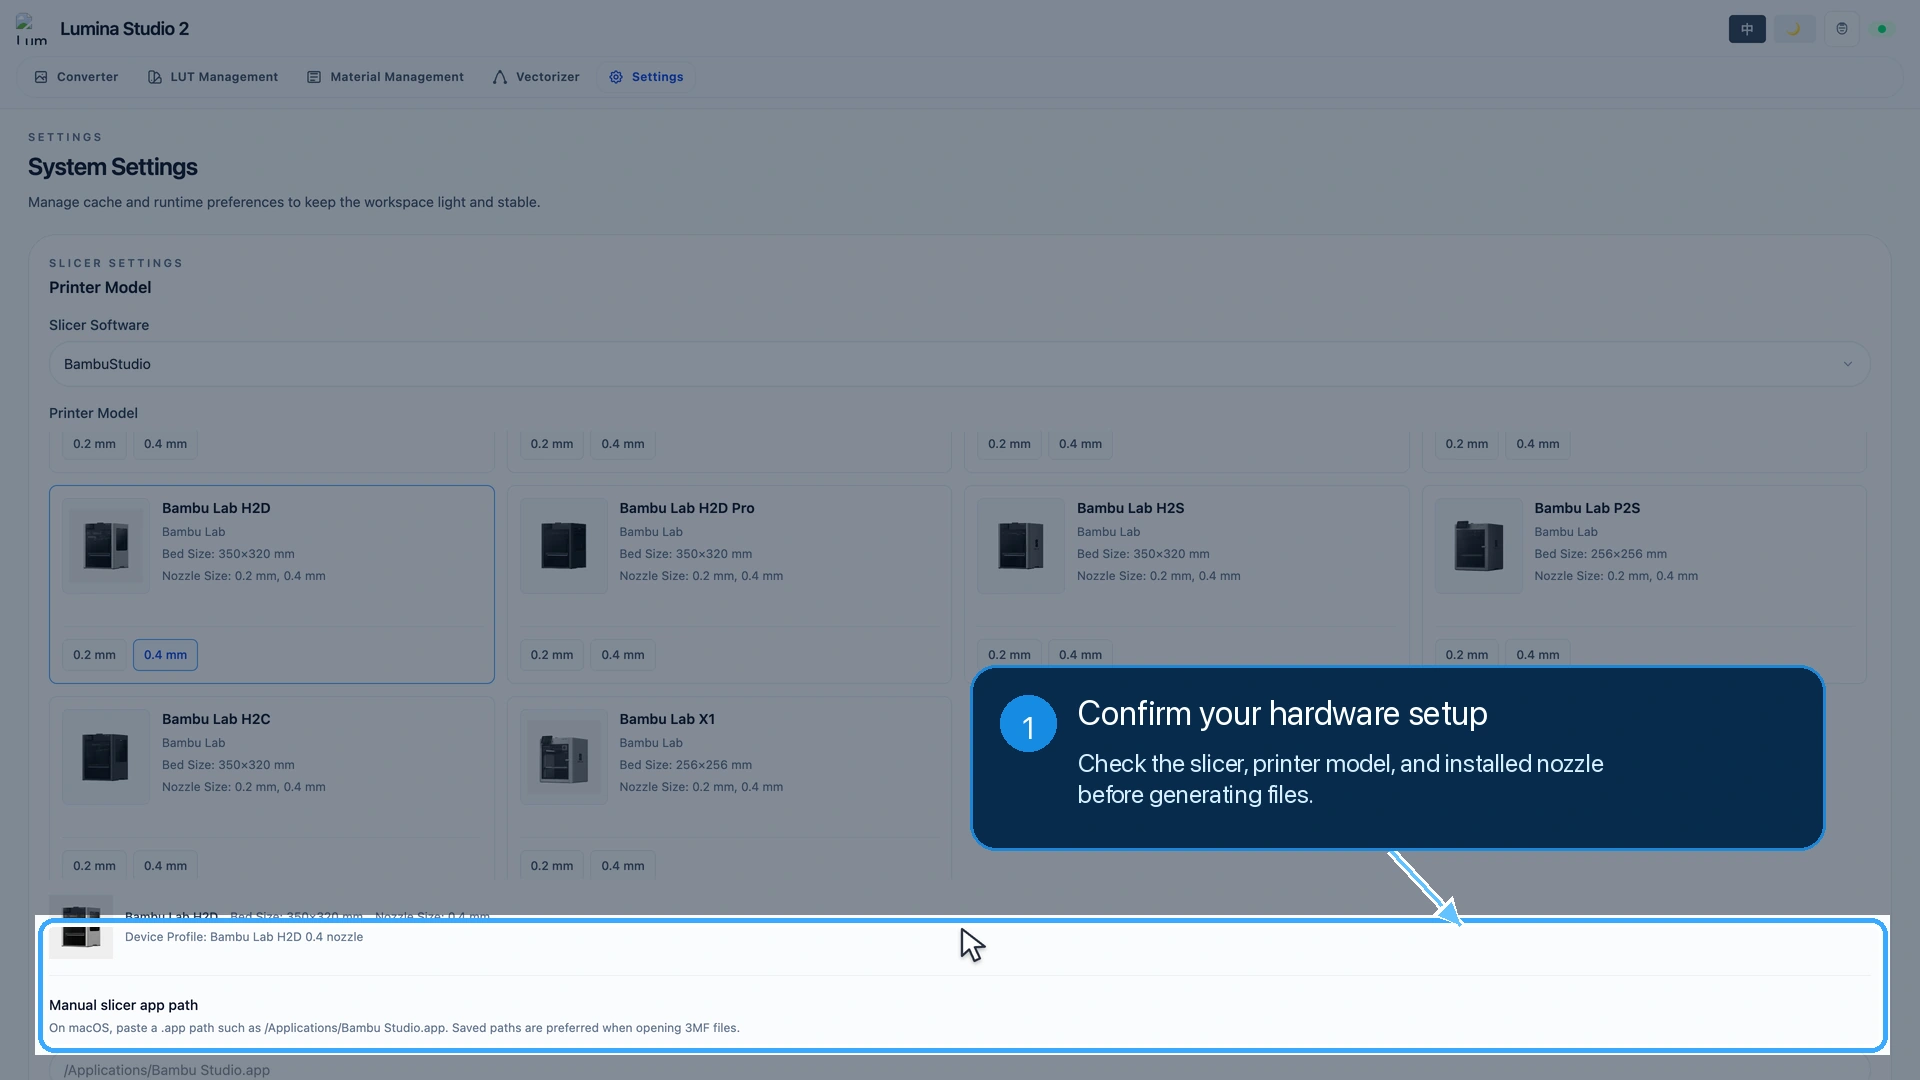
Open Settings in Lumina Studio and confirm the slicer you actually use, your printer model, and the nozzle currently installed on that printer. Correct any mismatch before continuing so the generated project matches your hardware.
Prepare three filaments:
- White filament for the first base.
- Black filament for the second base.
- The filament you want to calibrate. This tutorial uses red as the example.
The stepped colour blocks on both cards must use the same spool of test filament. For your first run, finish one spool from start to finish before starting another so the cards, photographs, and ZIP packages do not get mixed up.
You will also need Bambu Studio or OrcaSlicer. The screenshots below use Bambu Studio, but the object and material-mapping steps are the same in OrcaSlicer even if a few labels differ.
Step 1: Open Gradient Generator
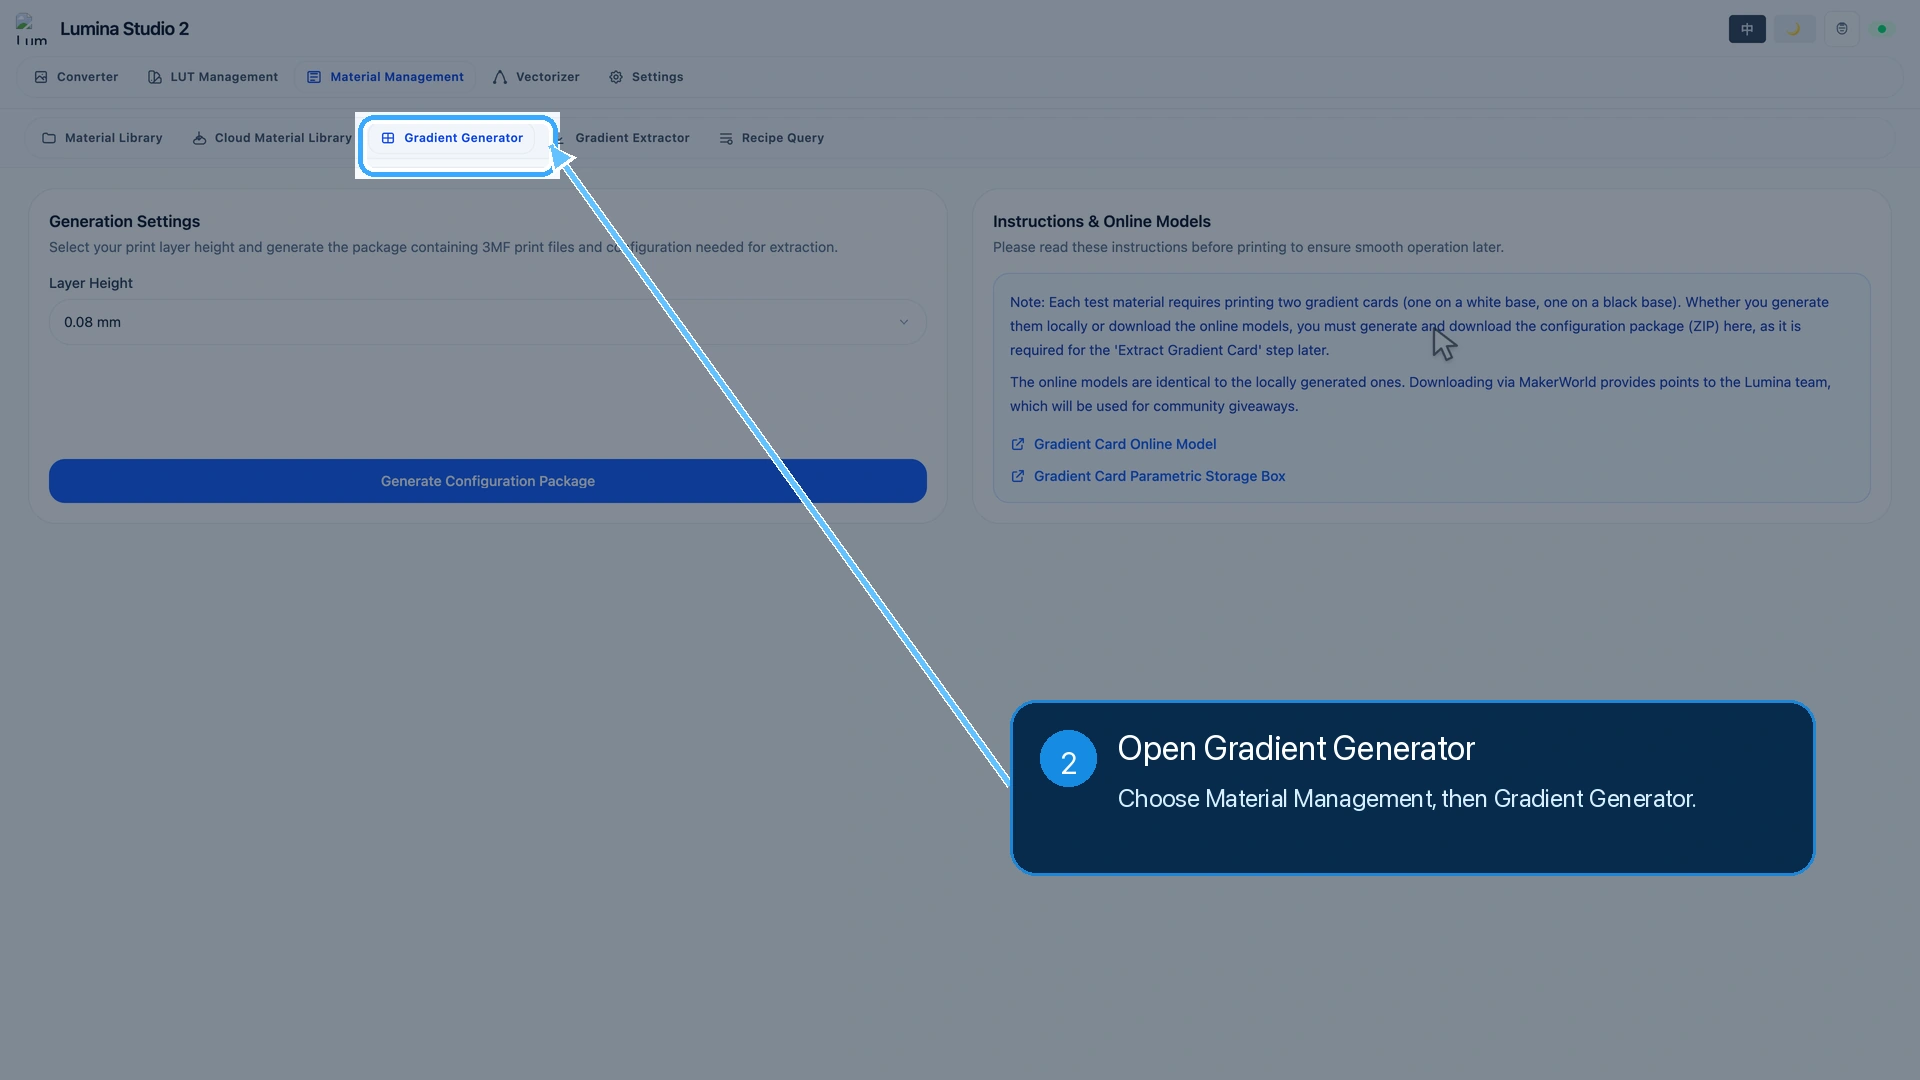
In Lumina Studio, select Material Management in the top navigation bar. Then select Gradient Generator in the second row.
You are on the correct page when Generation Settings appears on the left and Instructions & Online Models appears on the right.
Read the notice before continuing. Every test filament needs two cards: one with a white base and one with a black base. A single card does not provide enough information for the later extraction step.
Step 2: Choose the layer height
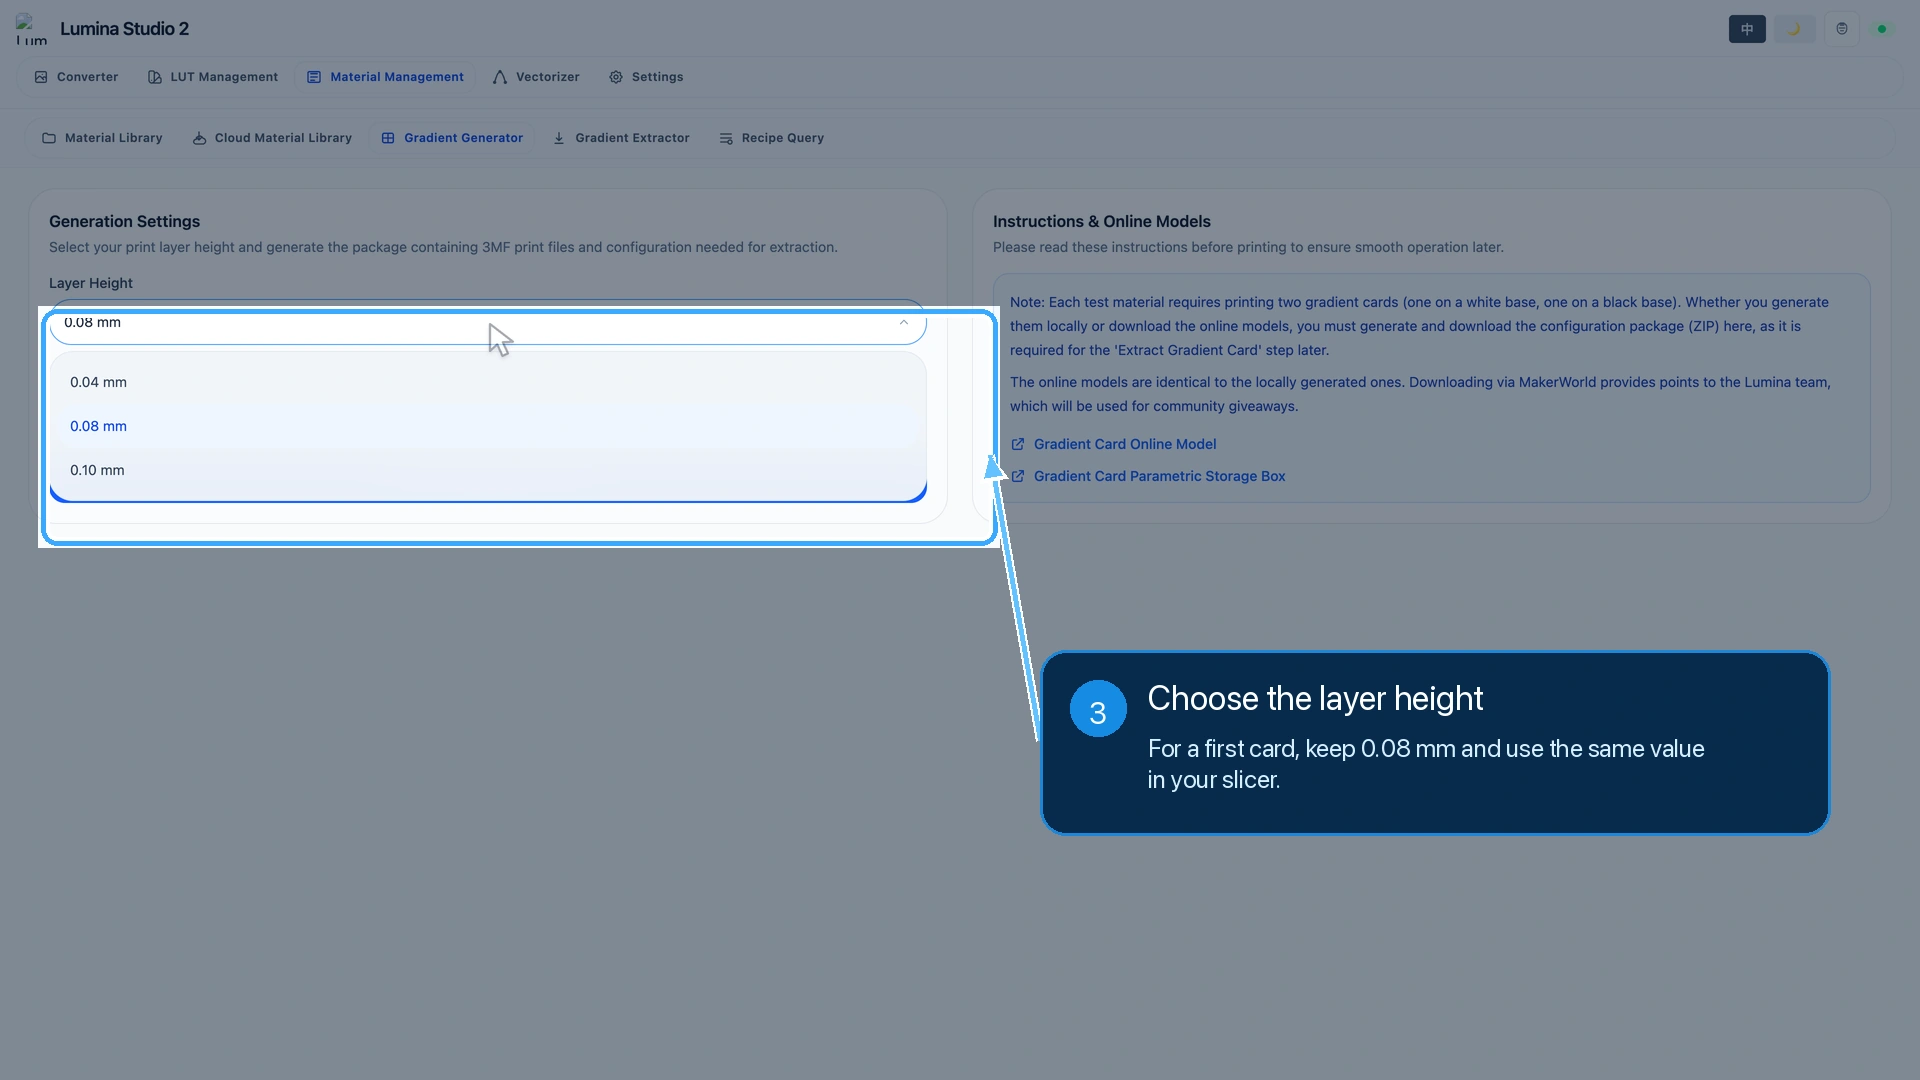
Under Generation Settings, open the Layer Height menu. The current choices are 0.04 mm, 0.08 mm, and 0.10 mm.
If this is your first gradient card, keep the default 0.08 mm. A 0.04 mm card is more demanding to print, photograph, and extract correctly, so it is better saved for later.
After selecting a value, check it once more. The layer height shown in Lumina must match the value used in your slicer. This tutorial uses 0.08 mm throughout.
Step 3: Generate and keep the ZIP
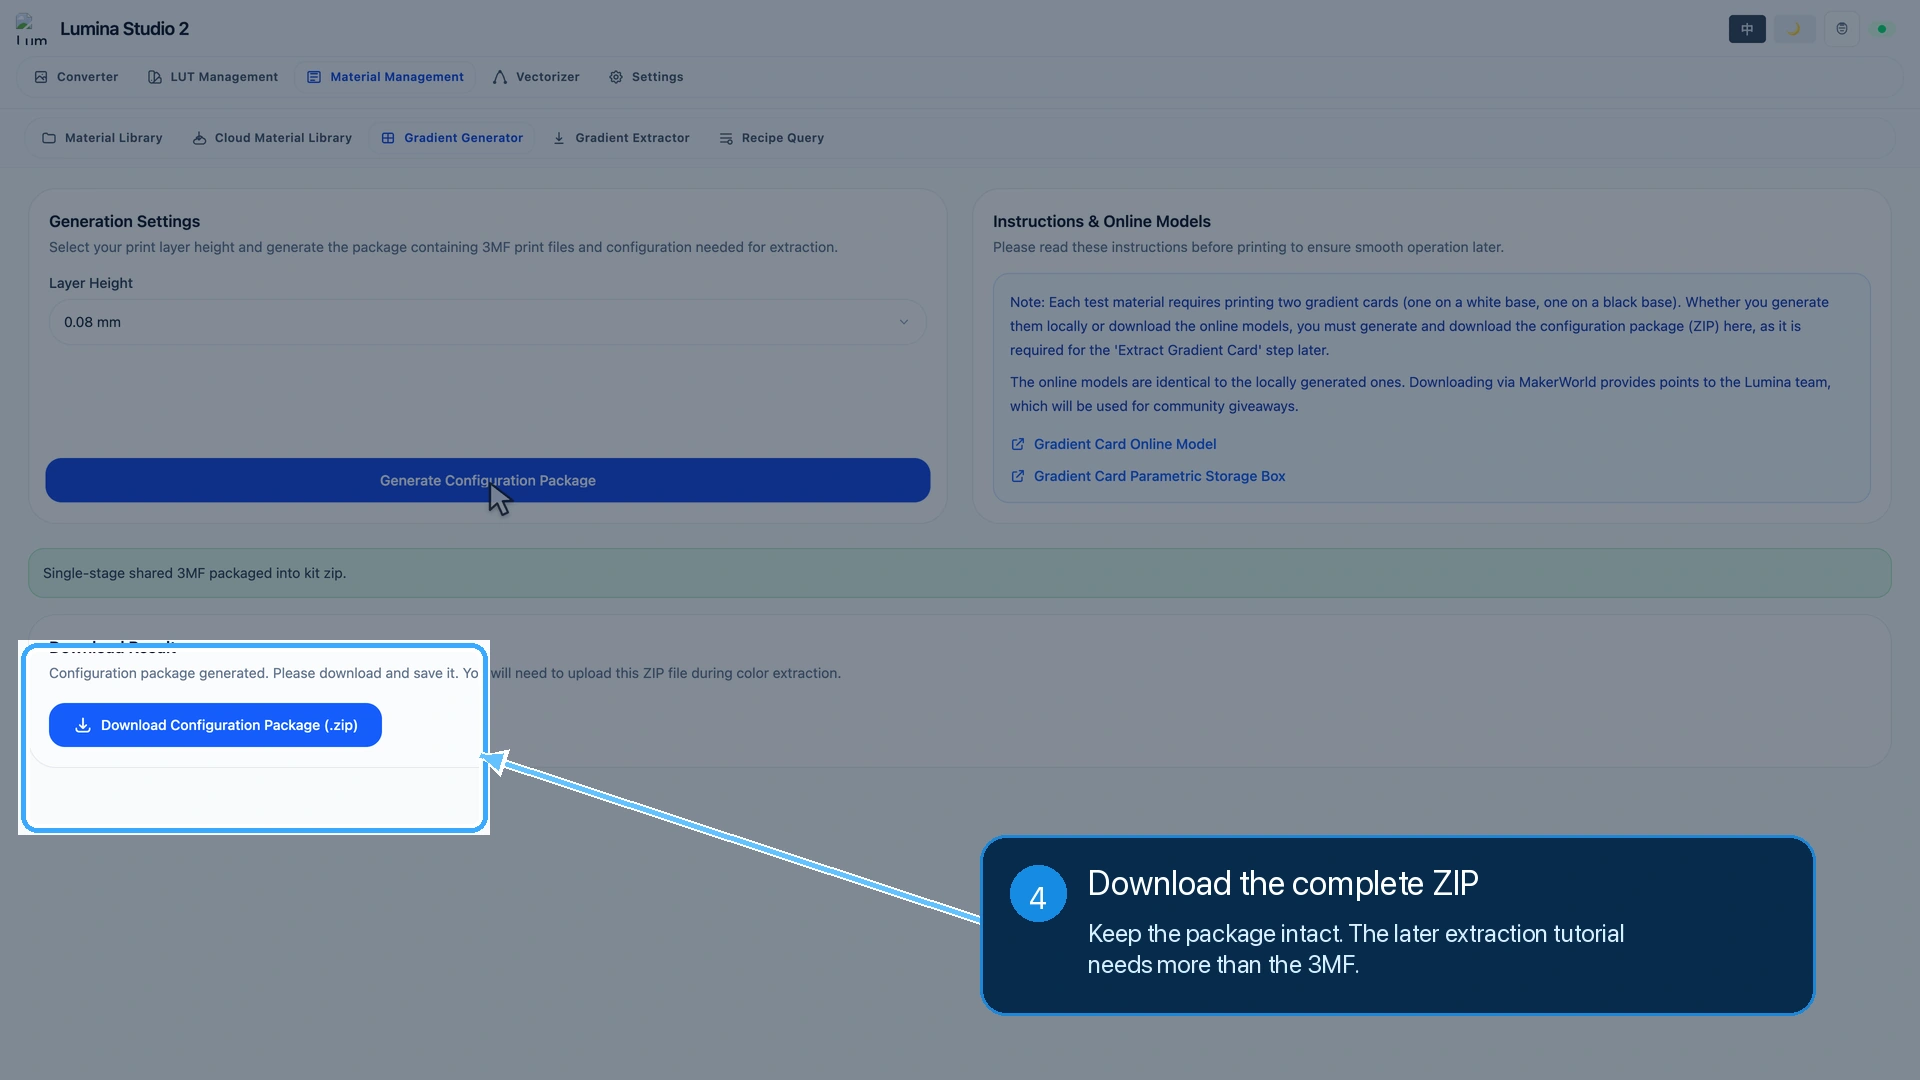
Select Generate Configuration Package once, then wait while Lumina builds the files.
When generation is complete, the Download Result section appears. Select Download Configuration Package (.zip) and save it somewhere easy to find. A useful folder name includes the filament, layer height, and date, for example Red-PLA_0.08_2026-07-20.
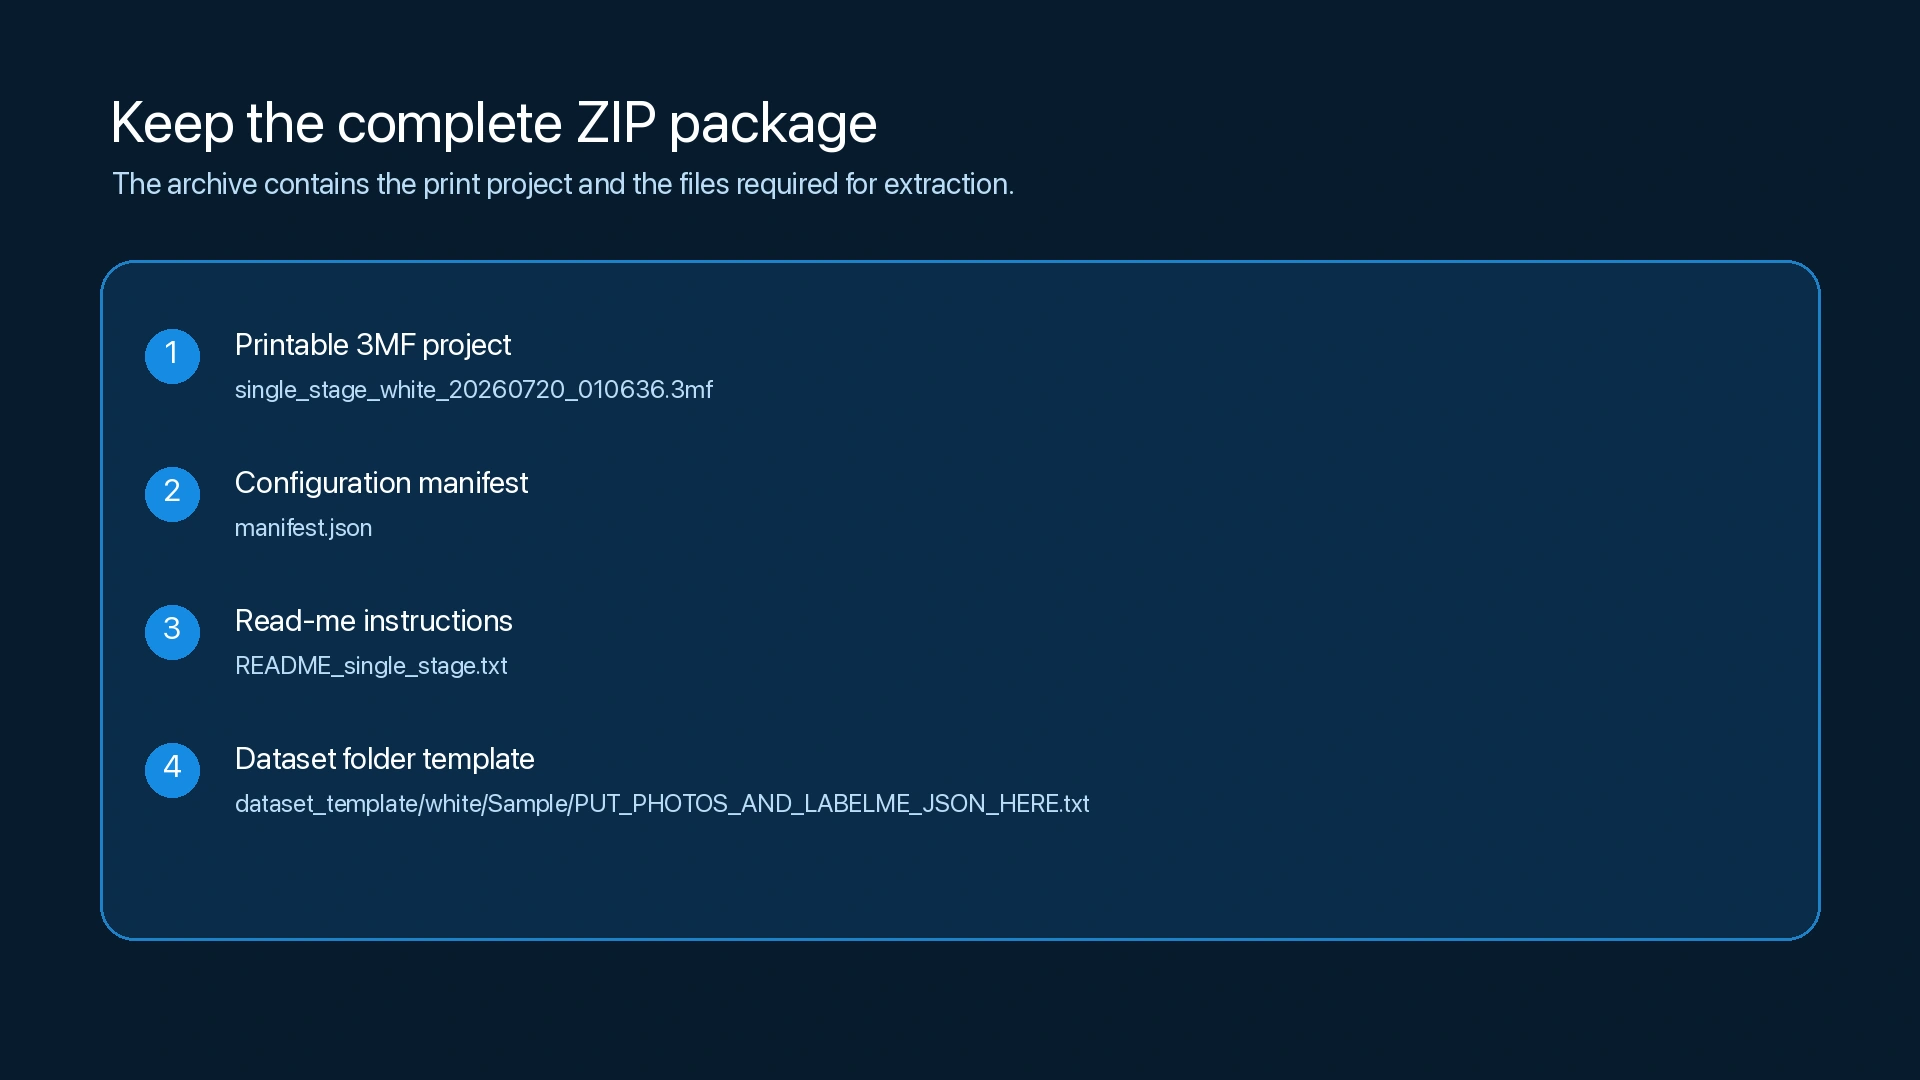
The ZIP is not just a model download. It also contains the manifest, instructions, and folder template required by Extract Gradient Card Data. Keep the package structure intact, and do not rename or delete its supporting files.
Optional: use the online MakerWorld model
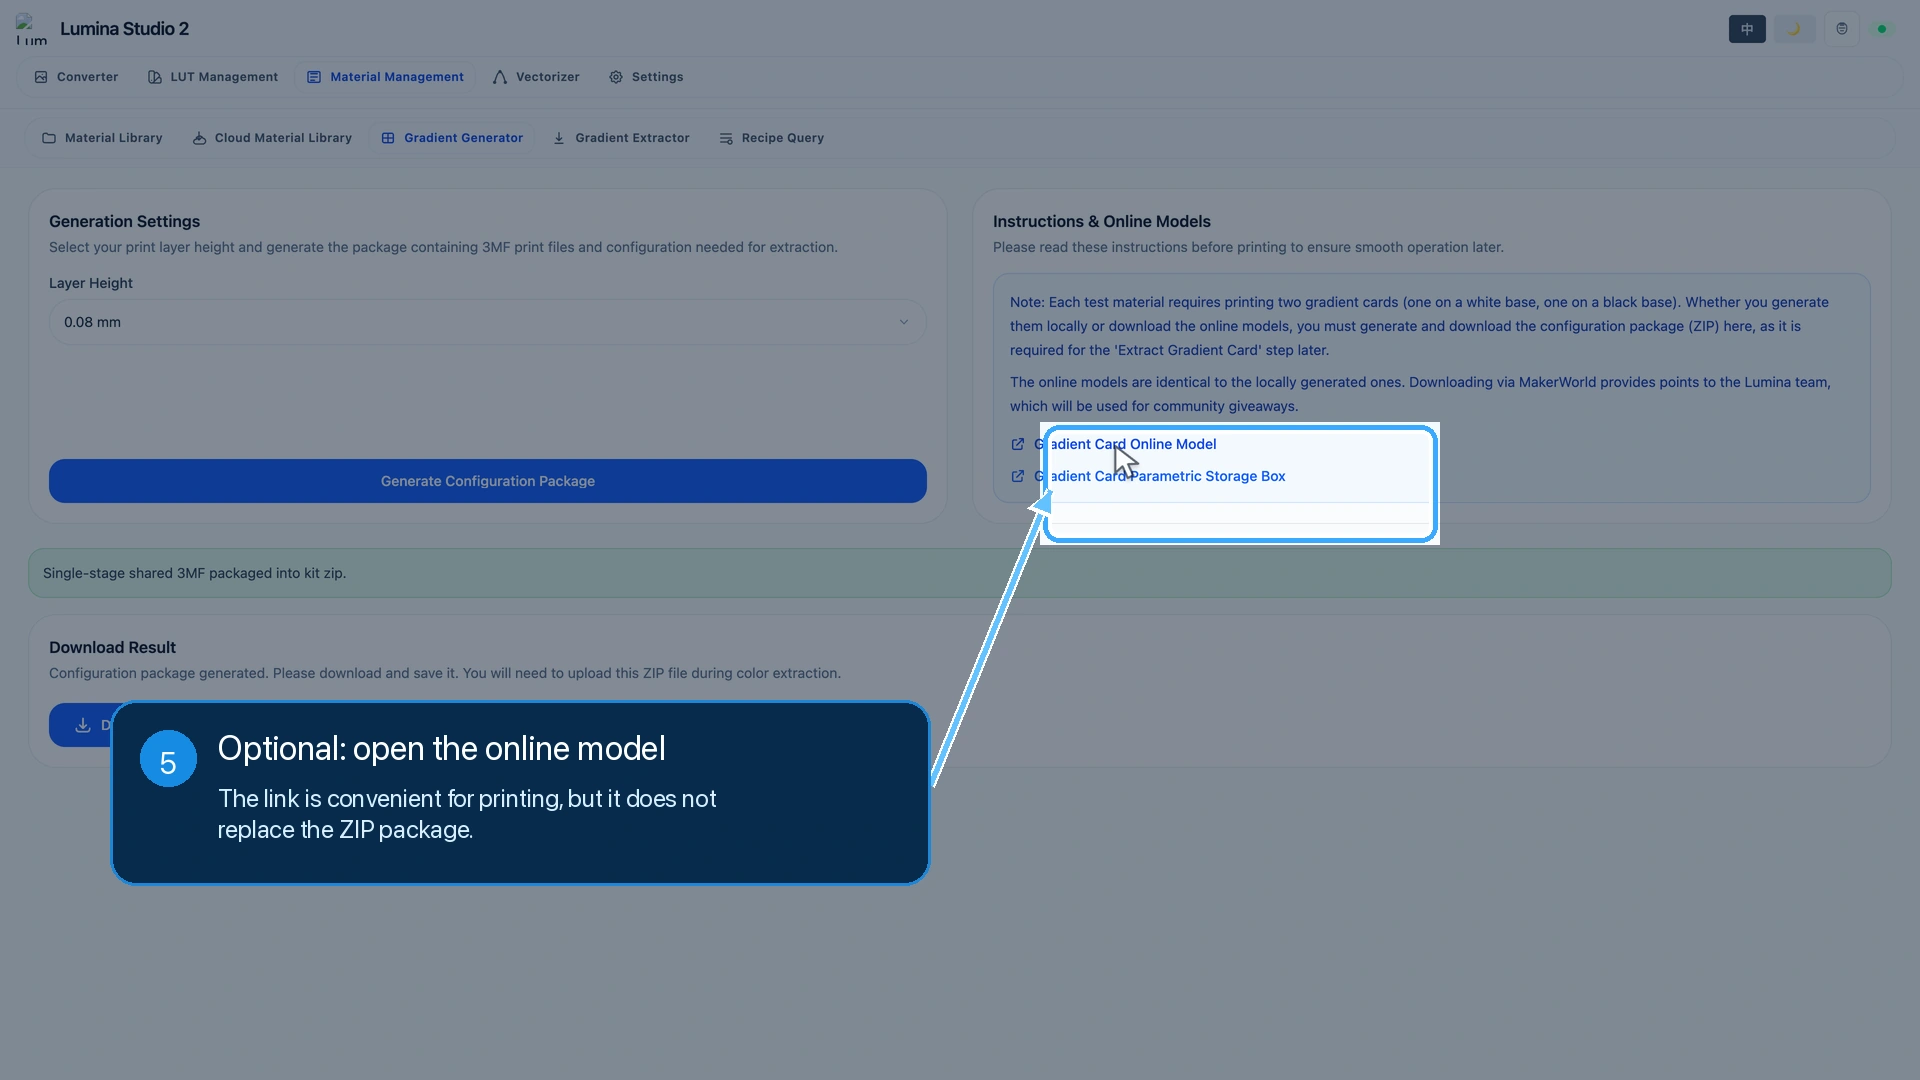
The right side of the Lumina page contains links to the online gradient card and its parametric storage box:
- Open the 0.08 mm gradient card on MakerWorld
- Open the parametric gradient-card storage box on MakerWorld
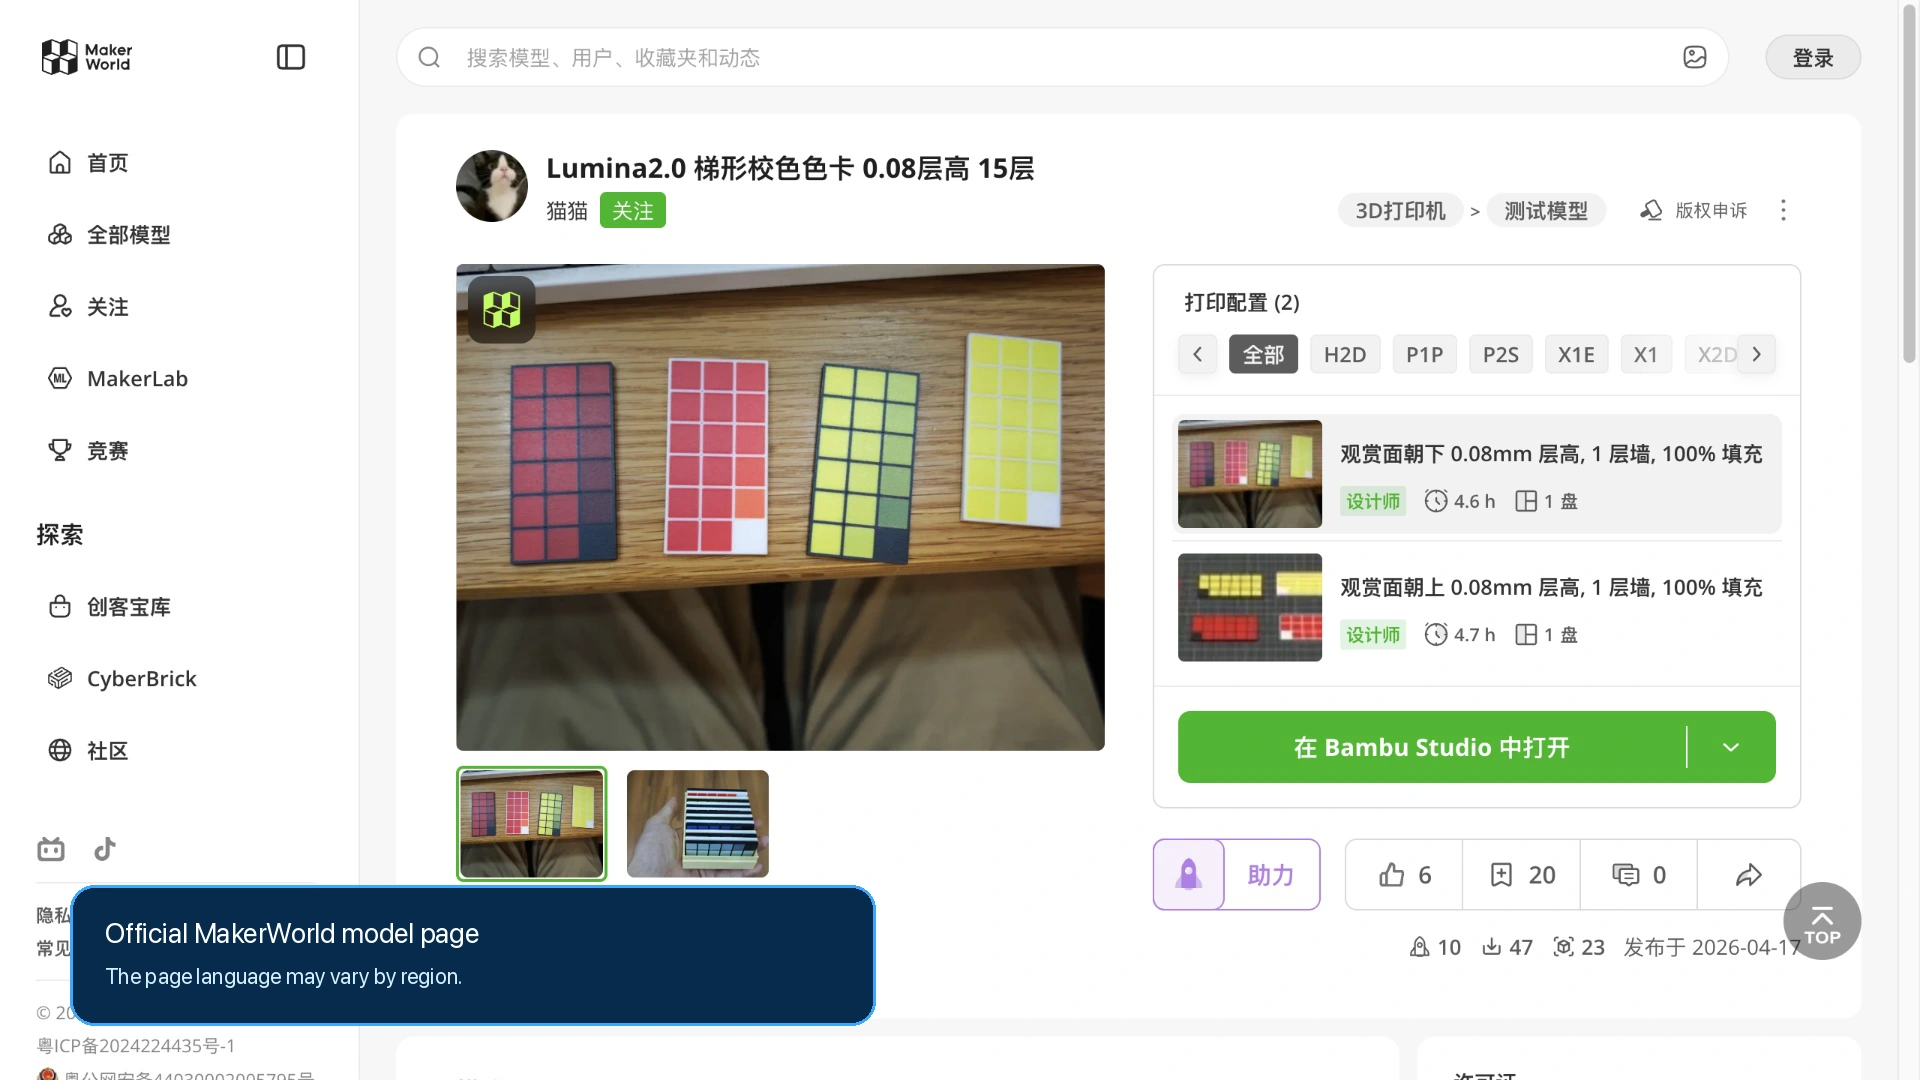
The official MakerWorld page may appear in your region's language. The linked gradient-card profile currently uses a 0.08 mm layer height. If you selected a different height in Lumina, use the 3MF from your ZIP instead.
Downloading through the official MakerWorld link also gives the Lumina team MakerWorld points used for community giveaways. This is optional; the locally generated model is the same. Even when you use the online model for printing, you must still generate and keep the ZIP from Lumina for extraction.
Step 4: Find and open the 3MF
Extract the ZIP, then locate the file ending in .3mf at the top level. You should also see manifest.json, a read-me file, and the dataset folder template. Keep all of them together.
Open the 3MF in Bambu Studio or OrcaSlicer. Once the project loads, expand Gradient Card in the Objects list. Each card contains two parts:
- Base - White is the backing plate.
- Step - Sample is the stepped gradient area that uses your test filament.
If the slicer reports an incompatible printer, nozzle, or profile, do not blindly replace every project setting. Return to Lumina Settings, verify the slicer, printer, and nozzle, then generate a fresh package.
Step 5: Prepare a white-base and a black-base card
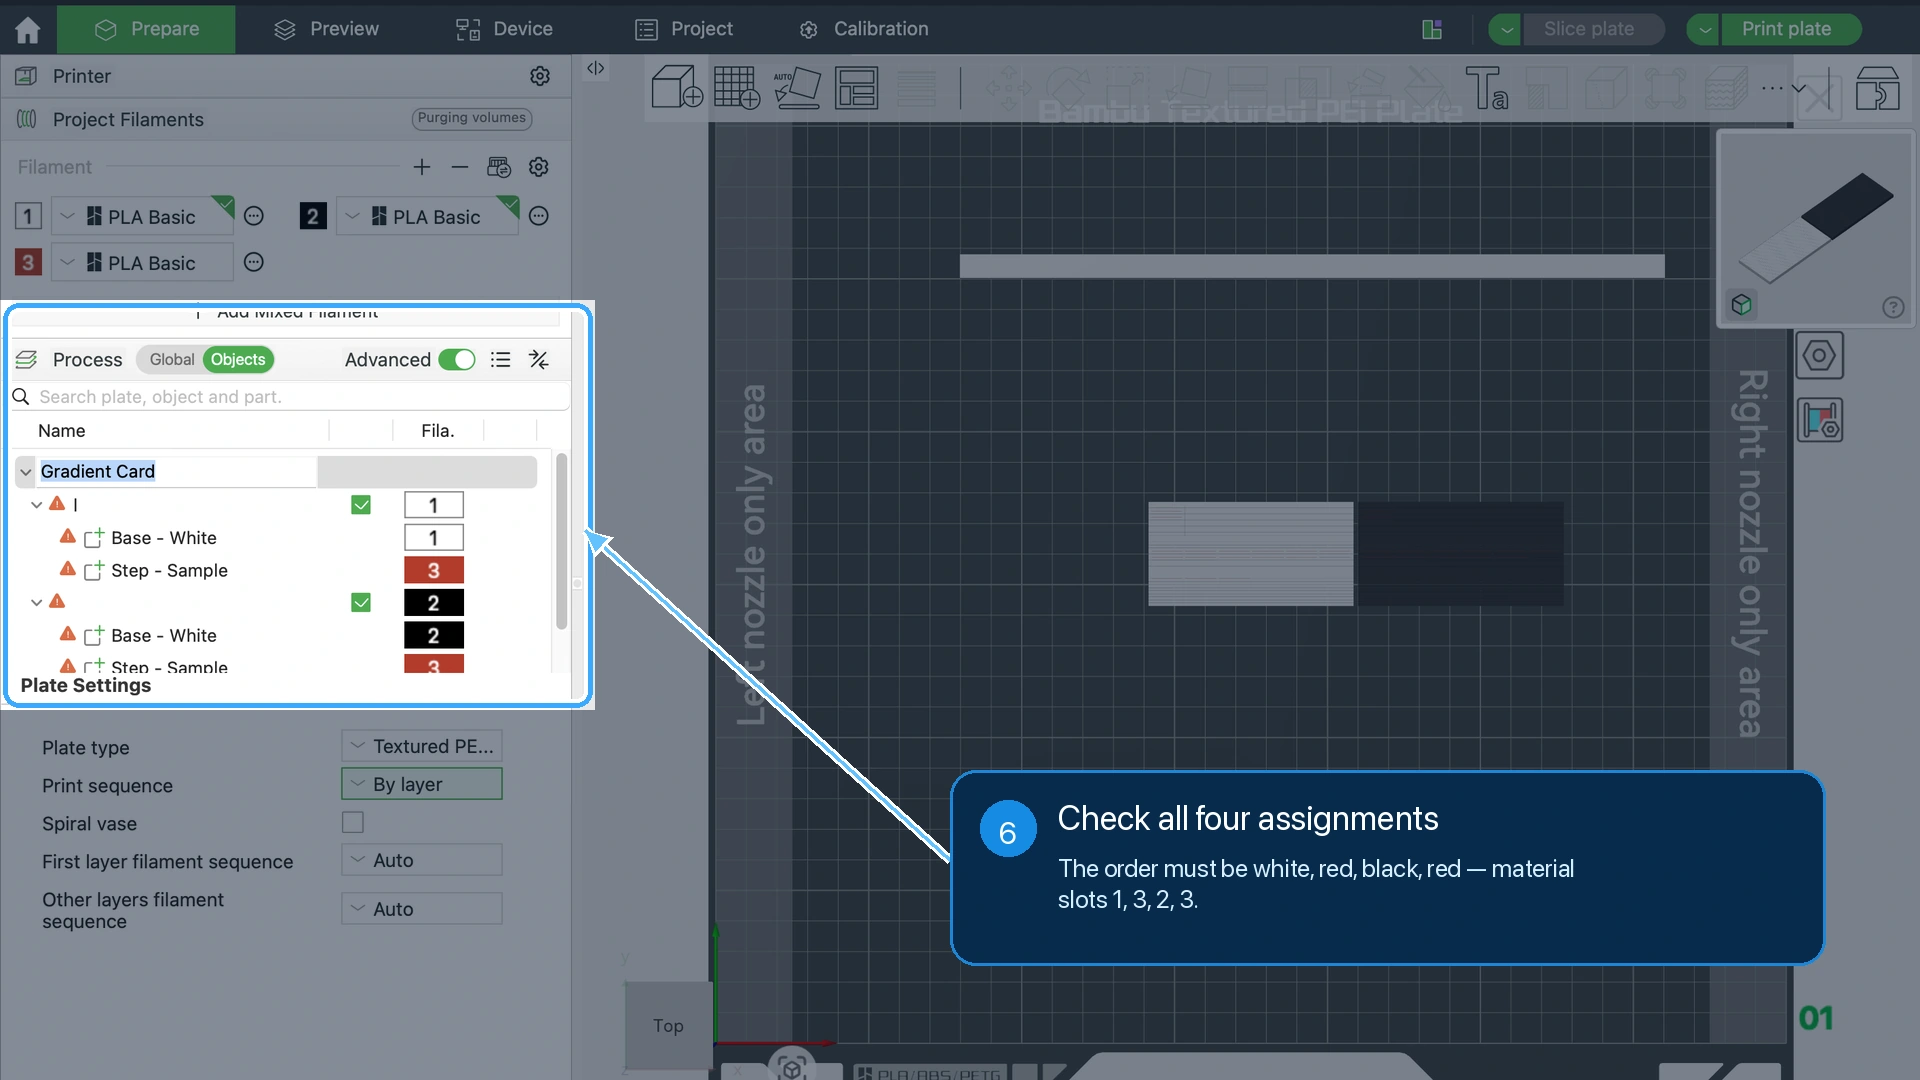
The generated project contains one complete card. Confirm that it contains both Base - White and Step - Sample, then duplicate the complete card so that two identical cards are on the same build plate.
For the first card:
- Assign Base - White to the white filament.
- Assign Step - Sample to the red test filament.
For the second card:
- Assign the base object to the black filament.
- Assign Step - Sample to the same red test filament used by the first card.
The second base object may still be named Base - White. That is only the original object name; the printed colour comes from its filament assignment.
Check all four assignments in order. They must be white, red, black, red. In this example, the material slots are 1, 3, 2, 3. Do not scale the cards, change their height, or assign the base and sample steps to the same filament.
Step 6: Slice and inspect the result
Before slicing, confirm that the slicer is using your real printer and nozzle and that the process layer height matches the value selected in Lumina. In this example, it must be 0.08 mm.
Check the filament mapping once more. White, black, and red must not have been replaced by other slots automatically.
Select Slice Plate and wait for the real slicing process to finish. This tutorial does not synchronise printer data and does not send the job to a printer.
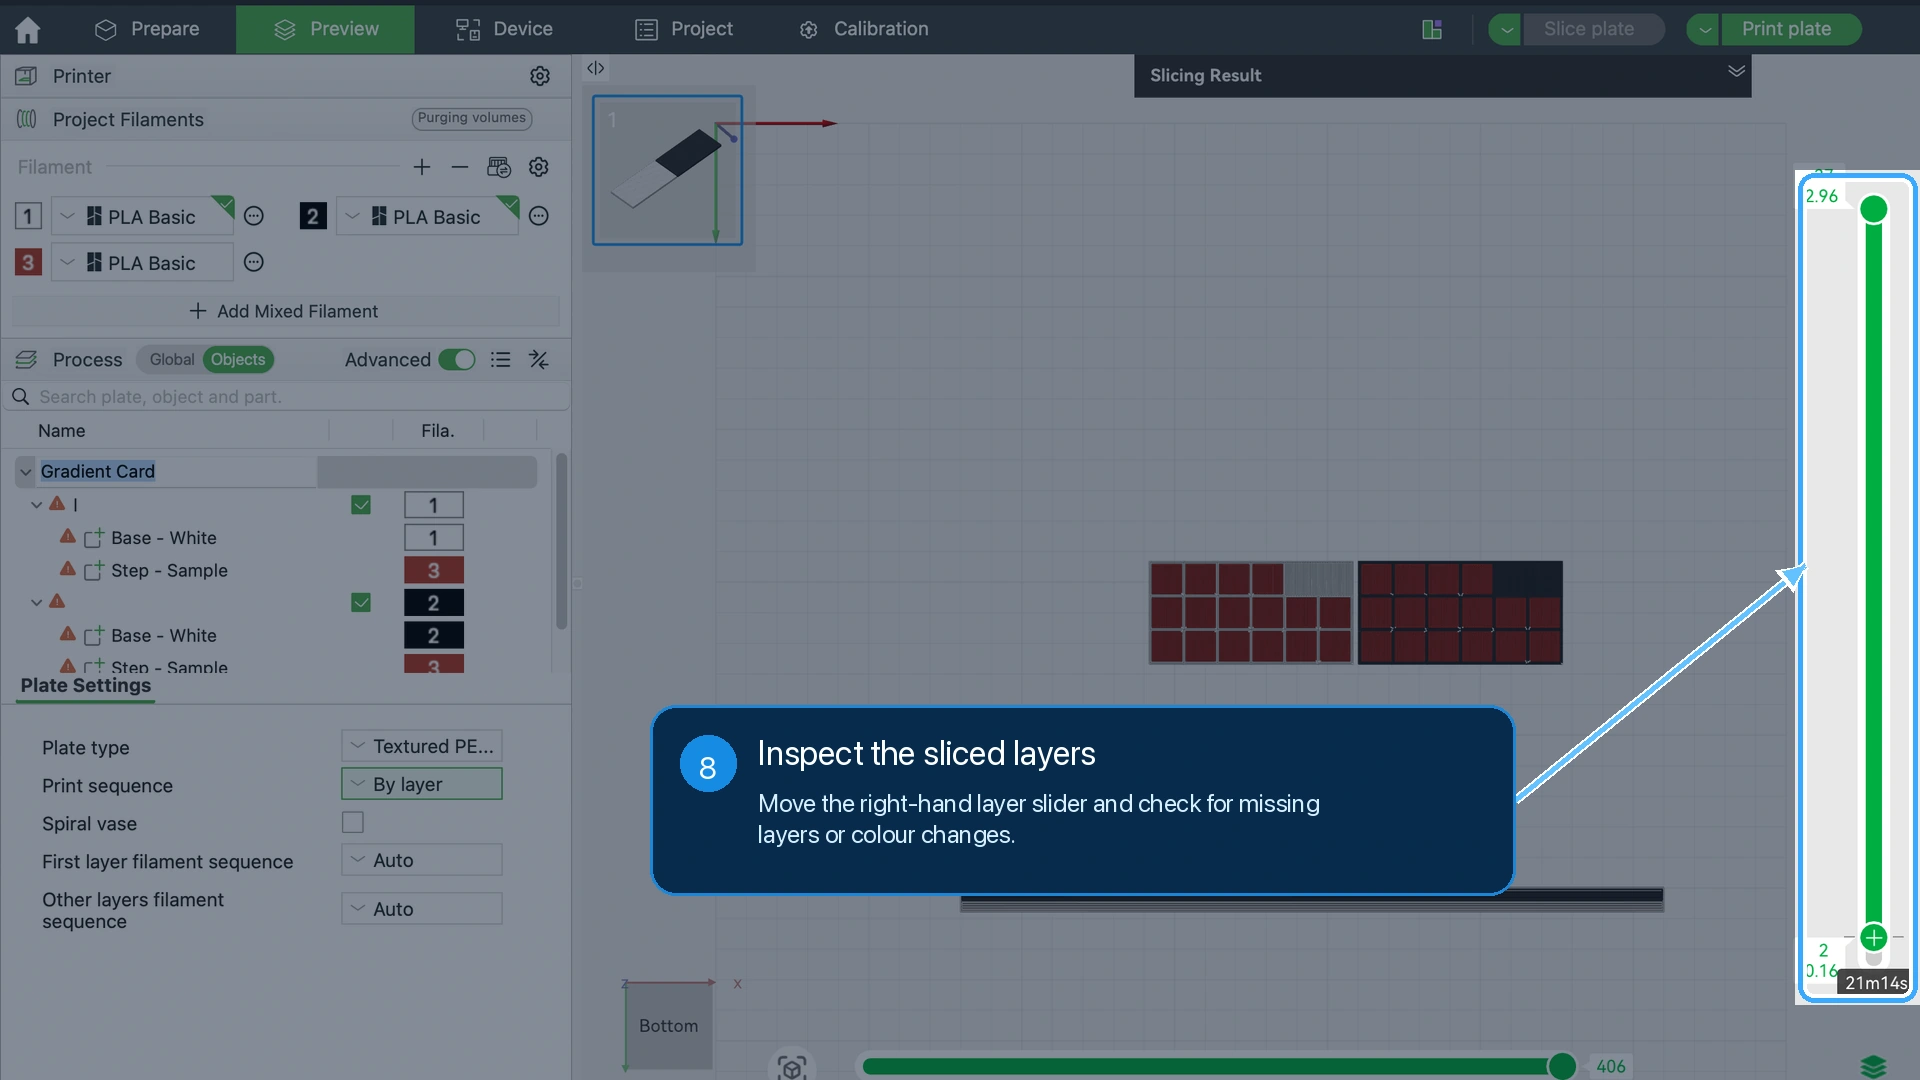
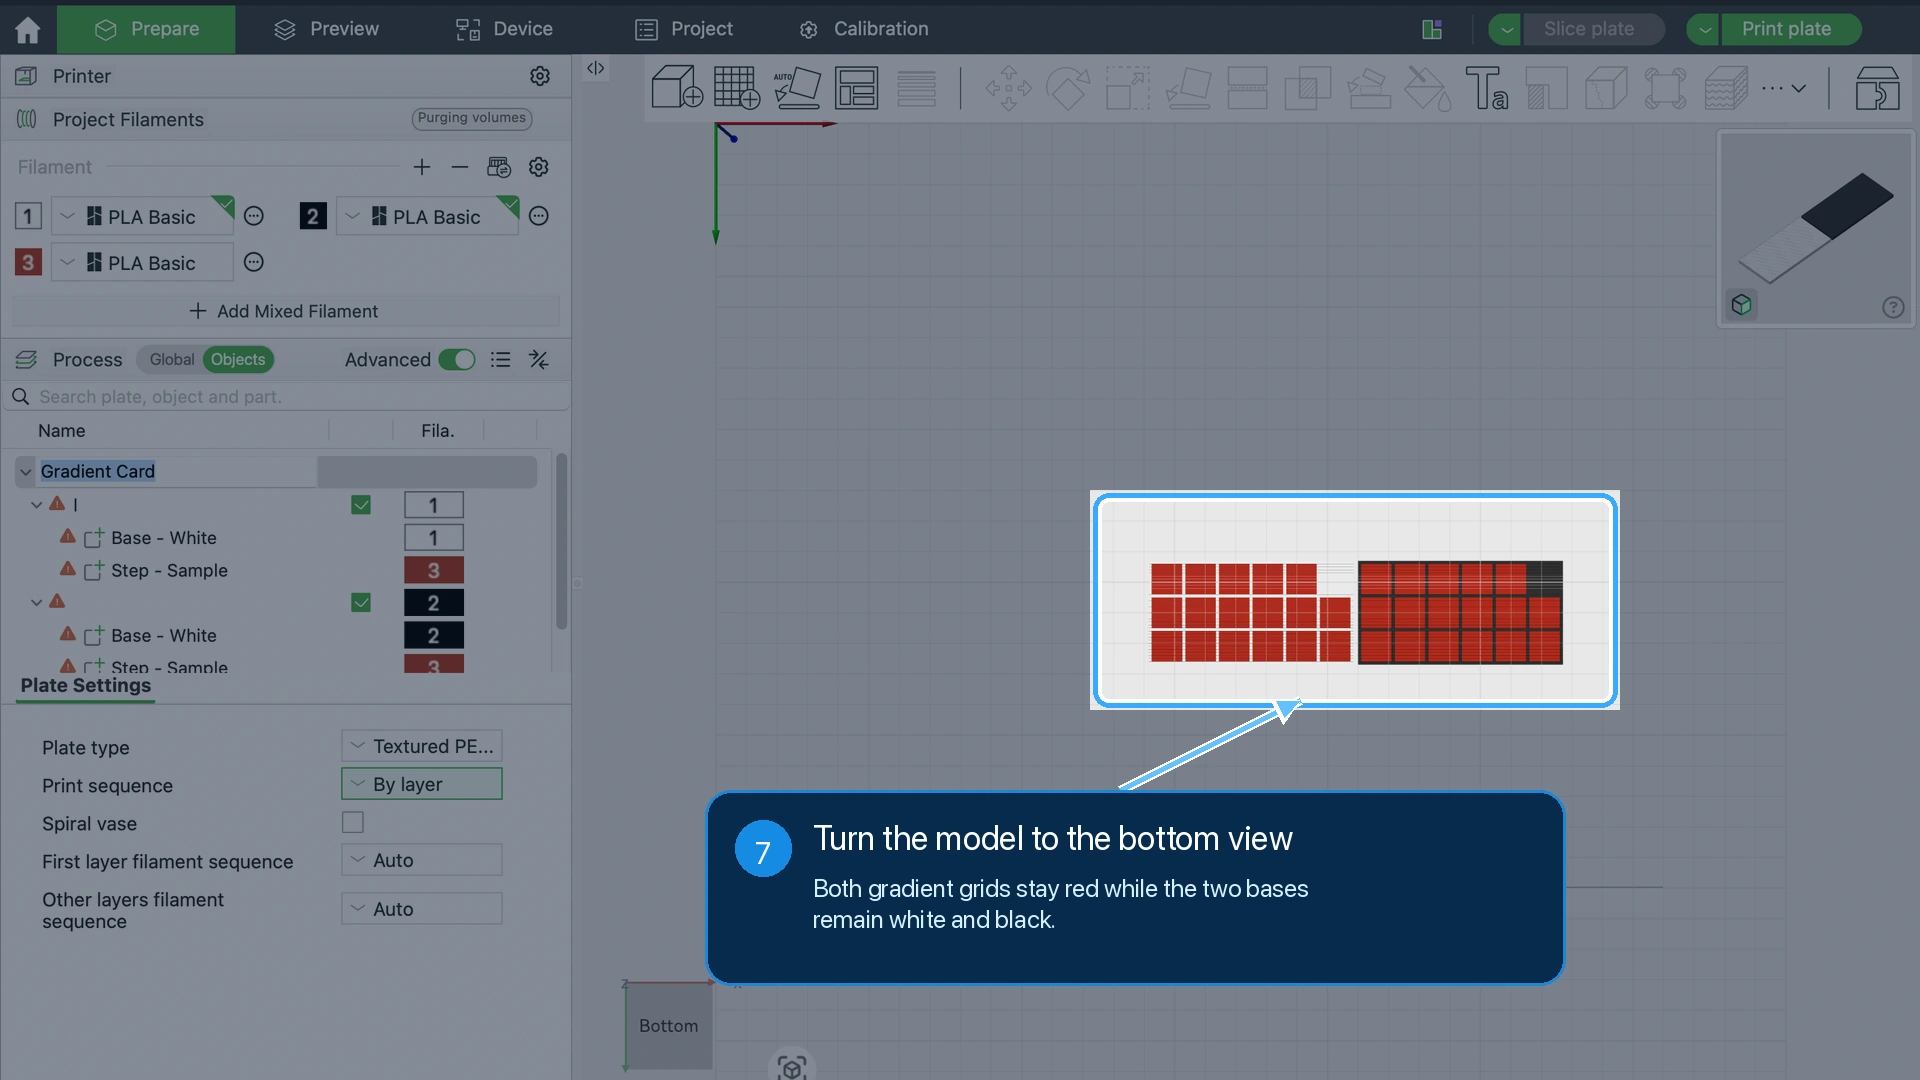
In Preview, turn the model to the Bottom view. Move the layer slider through the print. The white base and black base should remain distinct, while the stepped blocks on both cards remain red.
Check for missing layers, floating regions, or unexpected colour changes. Only after the preview is correct should you send the plate to your own printer.
When printing is complete, keep the two cards together and label them with the test filament name.
What to keep after printing
Keep these three items together:
- The white-base gradient card.
- The black-base gradient card.
- The complete ZIP downloaded from Lumina Studio.
Do not keep only the extracted 3MF, and do not mix packages generated at different layer heights or on different dates. During photography and extraction, the physical card pair must stay matched to the correct ZIP.
Common questions
Can I print only the white-base card or only the black-base card?
No. Every test filament needs both cards as a pair.
If I use the MakerWorld model, do I still need the ZIP from Lumina?
Yes. The online model can replace the local 3MF for printing, but it cannot replace the configuration package required for extraction.
Which layer height should I use first?
Start with 0.08 mm. Try 0.04 mm only after you are comfortable with printing, photographing, and extracting gradient cards.
What if the printer or nozzle does not match after I open the 3MF?
Return to Lumina Settings, choose the correct slicer, printer, and nozzle, then generate the package again.
Why is the second black base still named “Base - White”?
That is the original model-part name. The actual base colour is determined by the material slot assigned in the slicer. Trust the material mapping and the sliced preview.
Submit feedback
Your feedback is sent privately to the Wiki maintainers and is not displayed publicly on this page.