This article was prepared with AI assistance using the application source code. If anything is inaccurate, or you have a clearer method, please suggest a correction through this page's feedback.
Add artwork to a flat model surface
Model texture places the image's multicolor structure on a selected flat face of an STL or OBJ while retaining the base model's outer dimensions. It suits objects with a usable flat face, such as signs and lids. It does not wrap artwork around arbitrary curved surfaces.
Checked against the source code available on October 19, 2026. Earlier versions called this feature Model Surface Overlay; the entry point and screenshots may differ.
Prepare the base model and artwork
Use an STL or OBJ with a clearly defined flat face, and an image or SVG for the artwork. Check the model's dimensions and solid geometry. Models without a closed volume, with incorrectly oriented faces, or with invalid geometry may be rejected during generation.
In Image Conversion, choose the color source and filaments you actually use. With a material archive, the base model uses the selected backing material. Its on-screen color alone does not confirm the material assignment.
Import the model
Open and enable the Model texture panel. Choose an STL or OBJ in its upload area, or drag the model into the workspace. Import artwork through the image uploader. If you drop a model and image together, Lumina handles them according to their file types.
Check the model filename and dimensions, then wait until face selection is available. This workflow uses a single-sided structure; some ordinary backing options in Basic Settings are hidden while it is enabled.
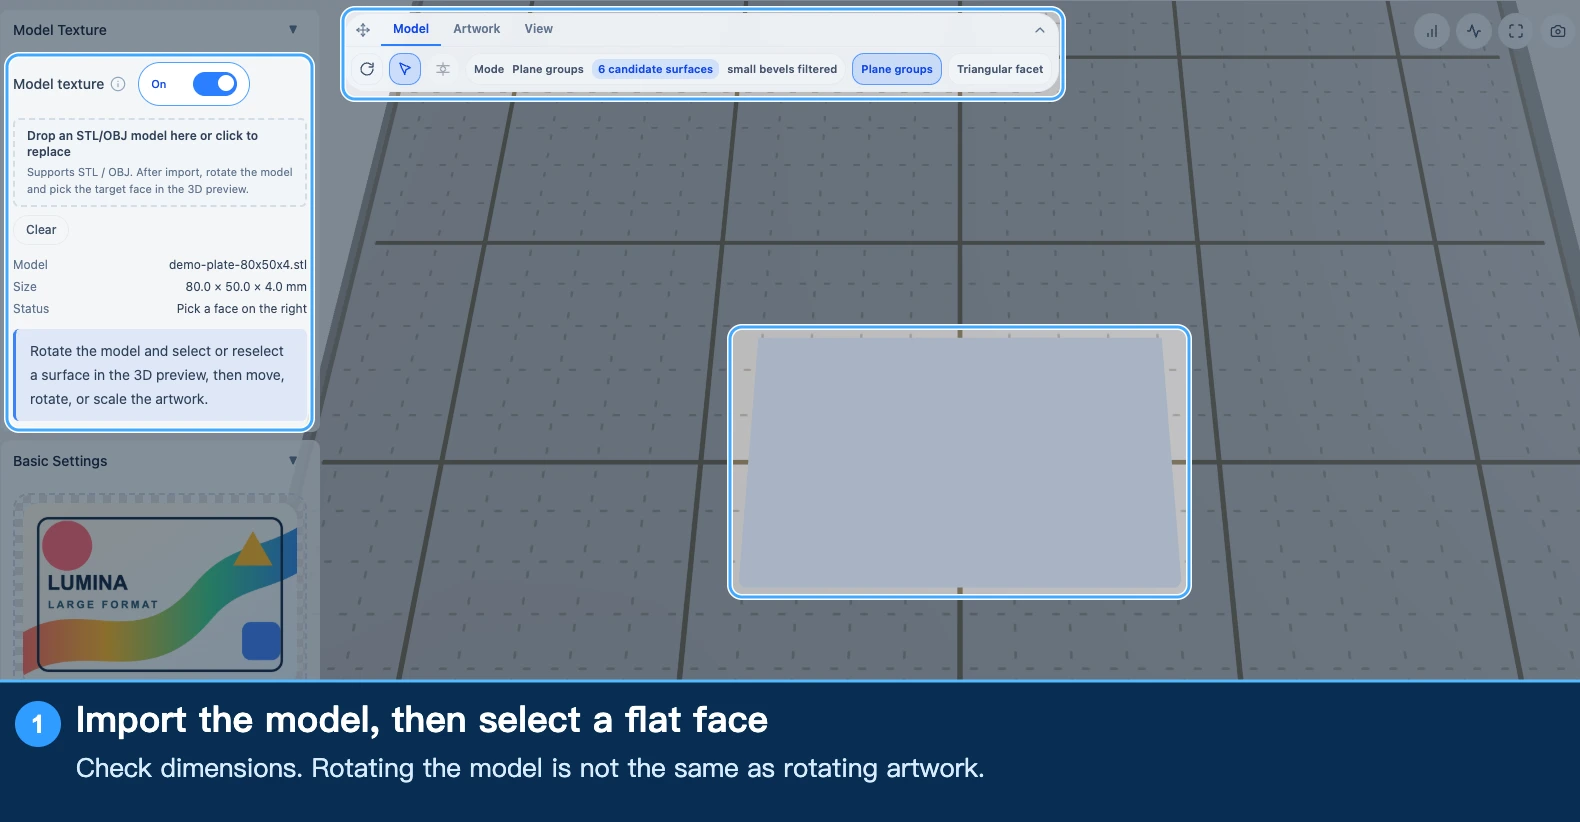
Select the flat face
Use face selection in the 3D preview. The default coplanar-group mode selects the triangles that form a flat surface together. Triangle mode helps inspect small faces, but a single triangle should not be mistaken for the whole usable surface.
Check the highlighted area and its dimensions. On a model with holes, verify that the openings remain. Correct the face selection before positioning the artwork.
The view cube, fit view, and front/back views change how you inspect the object. Model rotation changes the base model's orientation. Use the artwork tools to position the image rather than repeatedly rotating the model to compensate.
Position the artwork
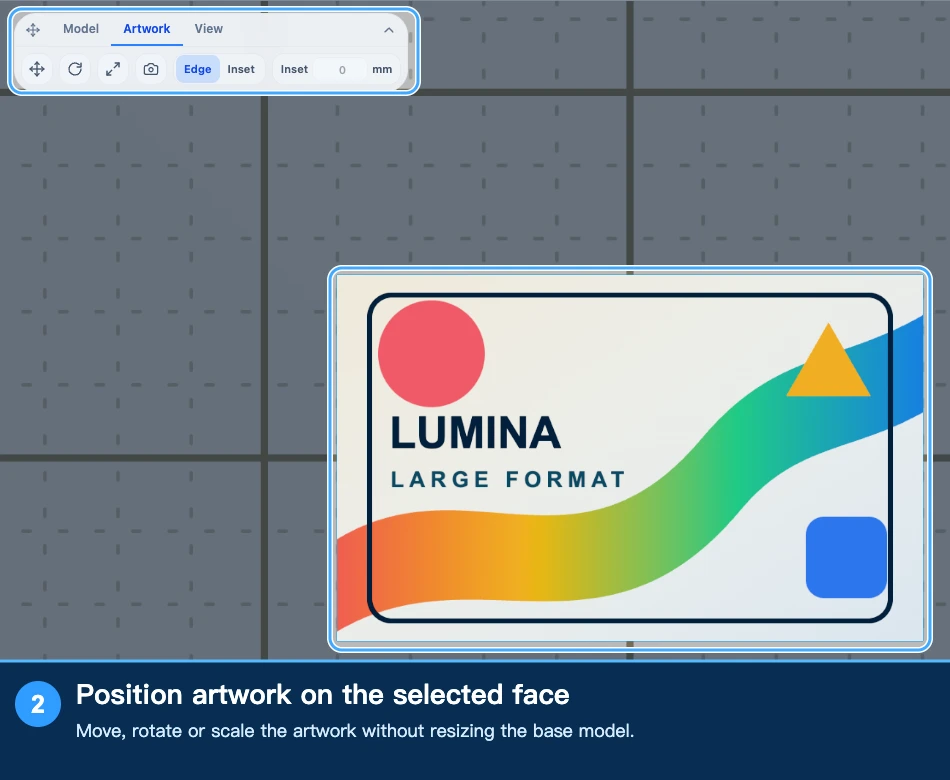
| Control | What it changes |
|---|---|
| Move artwork | Moves the image within the selected plane |
| Rotate artwork | Turns the image in the plane without rotating the base model |
| Scale artwork | Changes coverage without resizing the base model |
| Edge | Covers the selected face boundary; check outlines and holes |
| Inset | Sets an edge clearance in millimeters |
| Rotate model | Changes the entire model's spatial orientation |
Start with Fit, then adjust position, angle, and scale. Compare the 2D artwork with the selected face when aligning holes, text, and edges. Keep transparency in the source image where the artwork should leave an opening rather than add colored fill.
Preview, generate, and slice
- Finish artwork and material settings, then generate a preview.
- Check orientation, holes, edges, and base dimensions from both sides.
- Generate the 3MF and open it in your selected slicer.
- Check the base and artwork material assignments. Inspect the pocket, color layers, and base model layer by layer.
- Confirm that the object and wipe tower fit within the printable area, and complete an actual slice before printing.
The preview orientation helps you inspect the artwork. Export orientation also depends on the print-face setting. If the artwork seems missing from the initial view, inspect the object list and layer paths. Resolve face-selection, solid-geometry, or pocketing errors; a base model without its artwork is not a successful result.
Keep the source files
Share cards and JSON projects cannot currently include the base model and face selection. Recipe export is unavailable while Model texture is enabled. Archive the model, artwork, final 3MF, and a record of the placement settings so you can reuse them later.
Related: Device & slicer settings, Material mapping in your slicer.
Submit feedback
Your feedback is sent privately to the Wiki maintainers and is not displayed publicly on this page.