First Use: Configure Your Slicer, Printer, and Nozzle
Welcome to Lumina Studio. Before you begin, configure your printing equipment. Choosing the correct slicer, printer model, and nozzle size ensures that later steps match the hardware you actually use.
BambuStudio, the Bambu Lab P1S, and a 0.4 mm nozzle are examples only. Select your own slicer and equipment instead of copying the example settings.
Before you start
Confirm these three details:
- the slicer you normally use;
- the exact model of your printer;
- the nozzle size currently installed on that printer.
If you are unsure about the nozzle size, check the printer information, nozzle packaging, or the marking on the nozzle before making a selection.
Step 1: Open System Settings
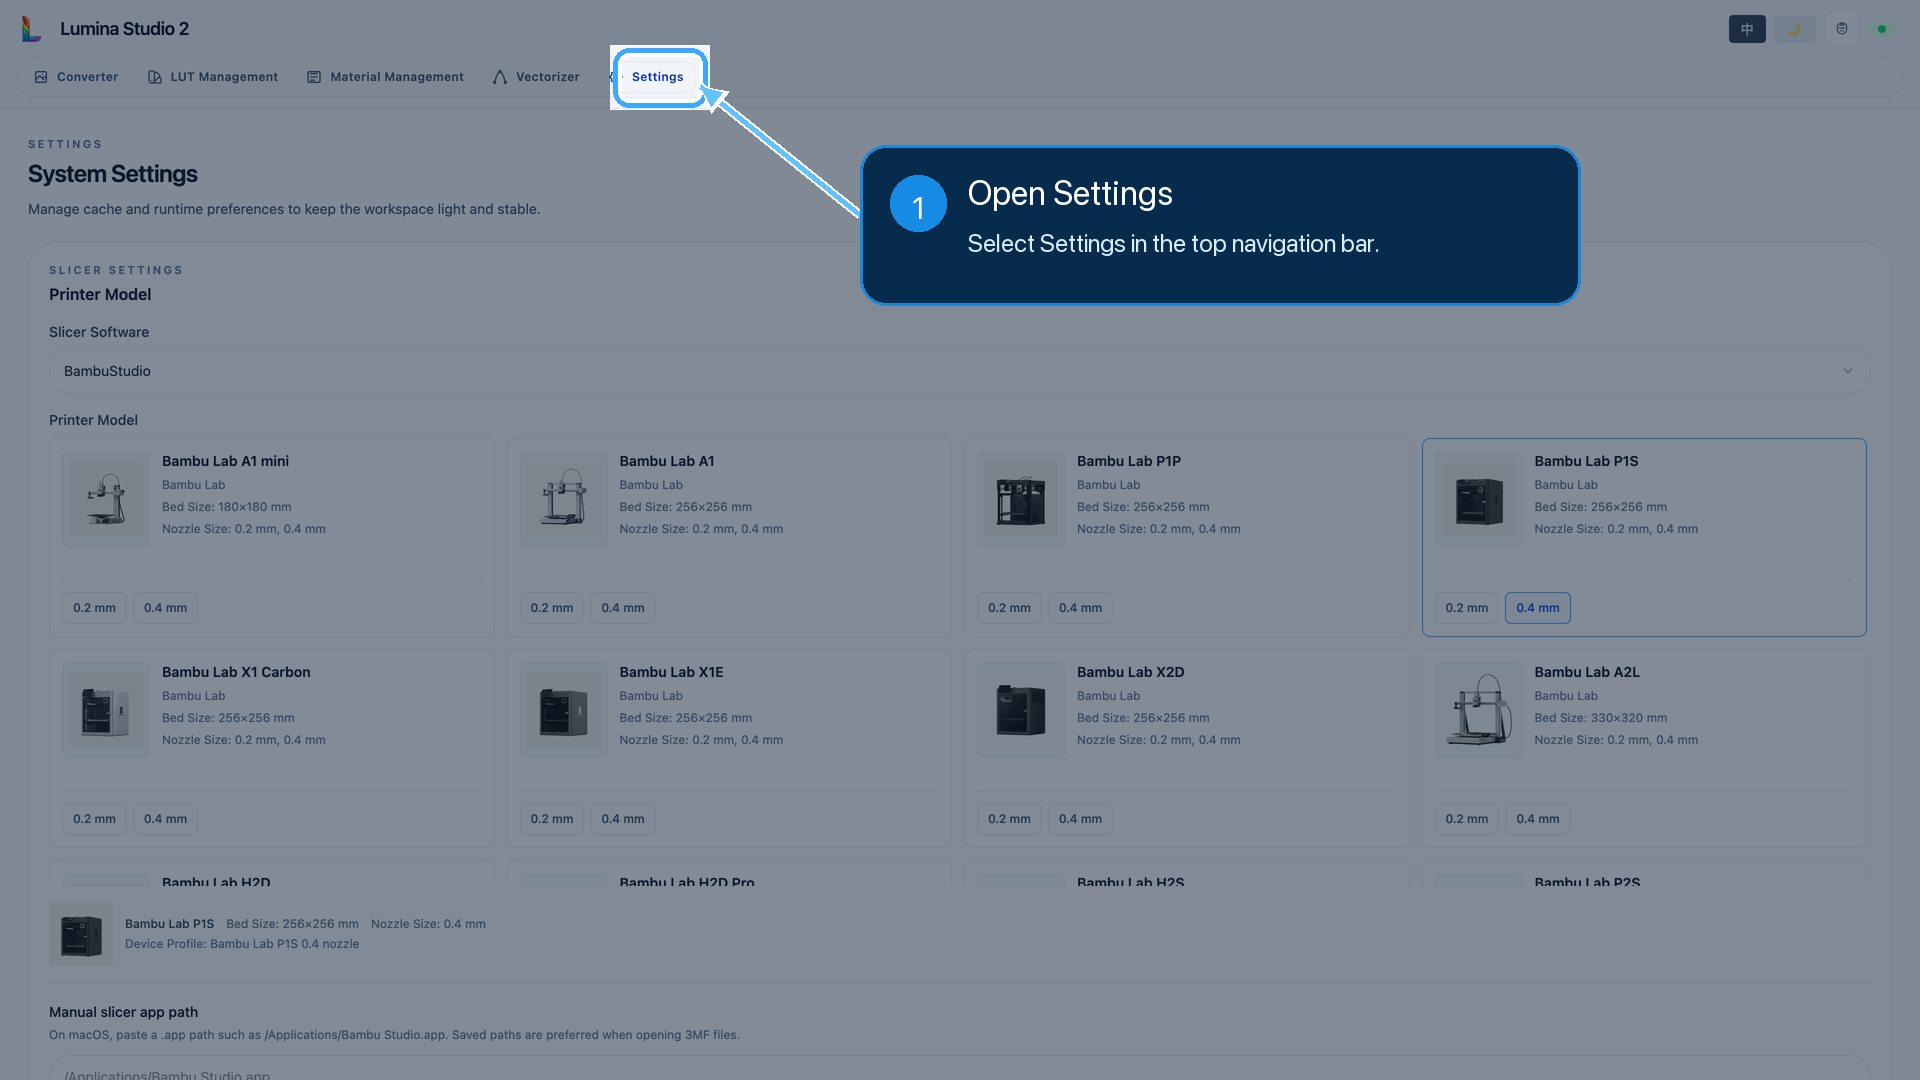
Open Lumina Studio, then select Settings at the top of the page to enter System Settings.
Step 2: Open the slicer menu
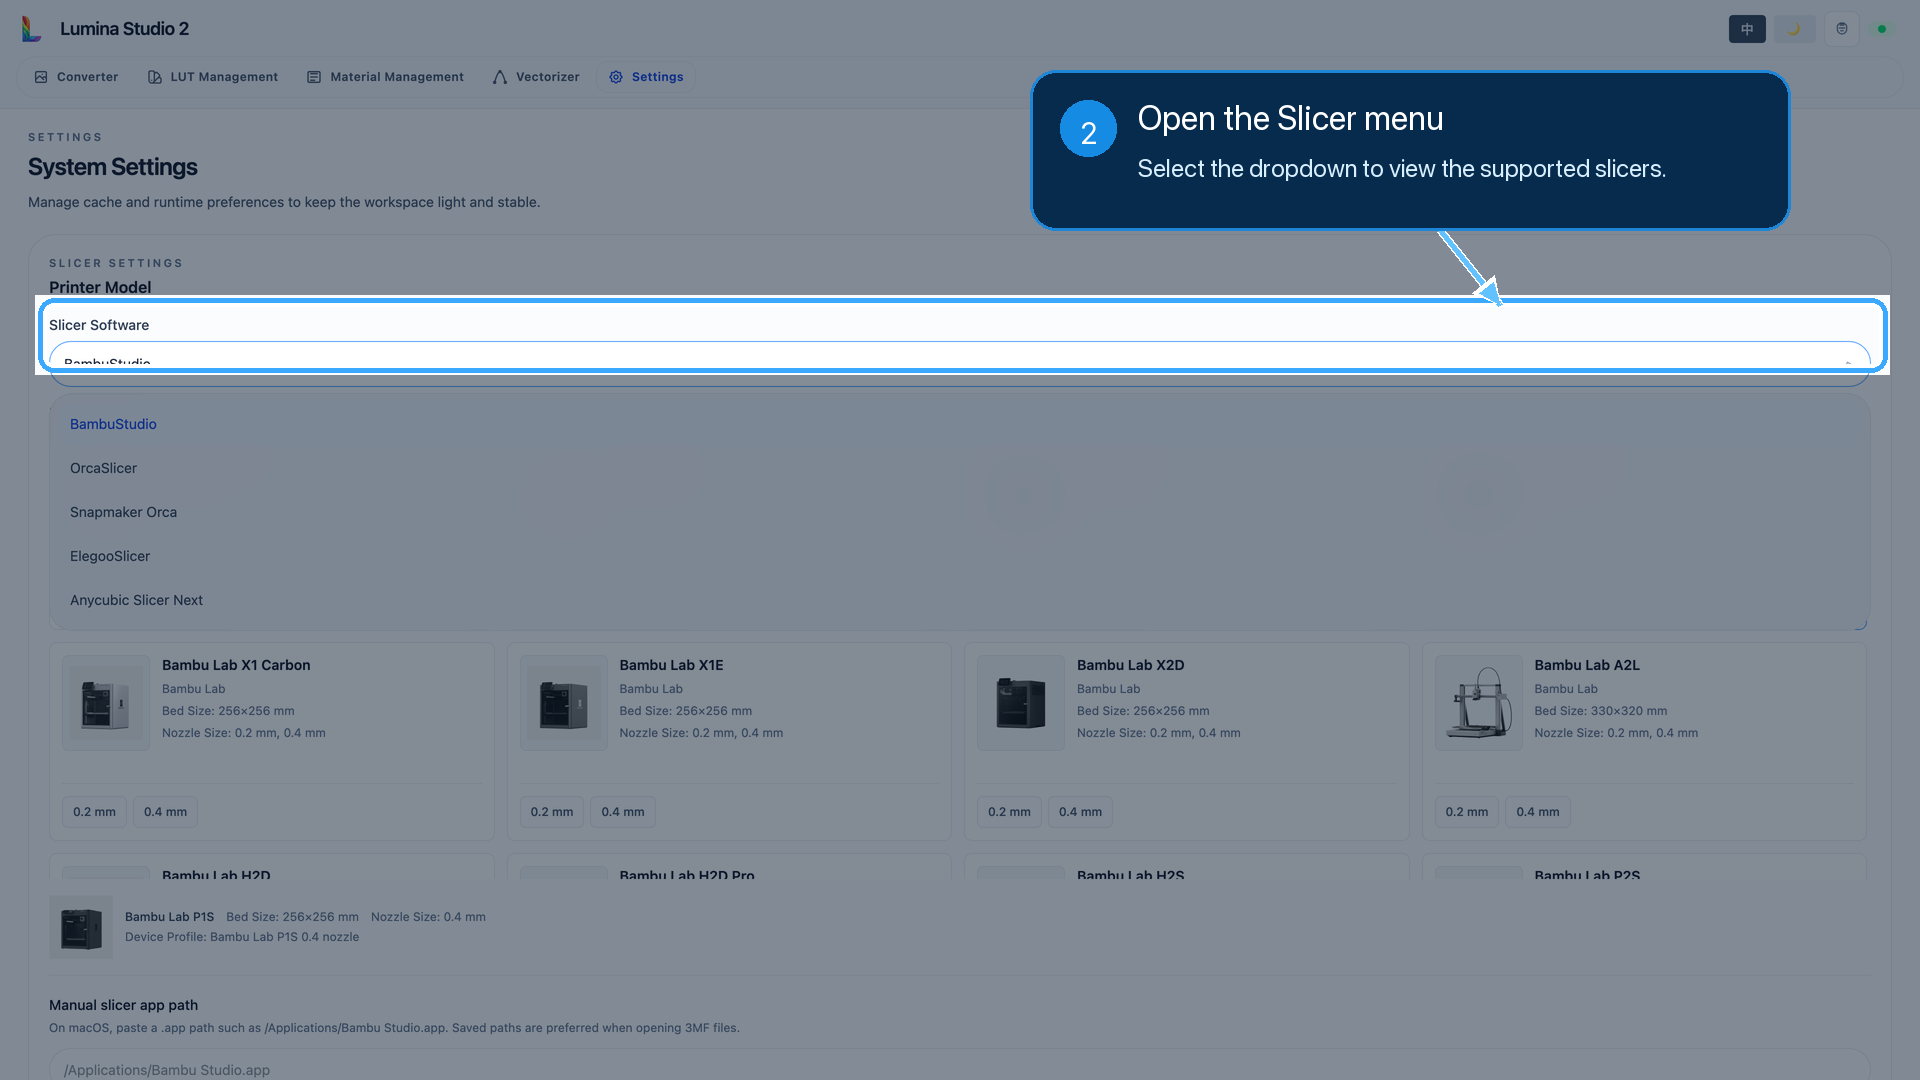
Find Slicer on the System Settings page. Open the menu to view the slicers currently supported by Lumina Studio.
Step 3: Select the slicer you actually use
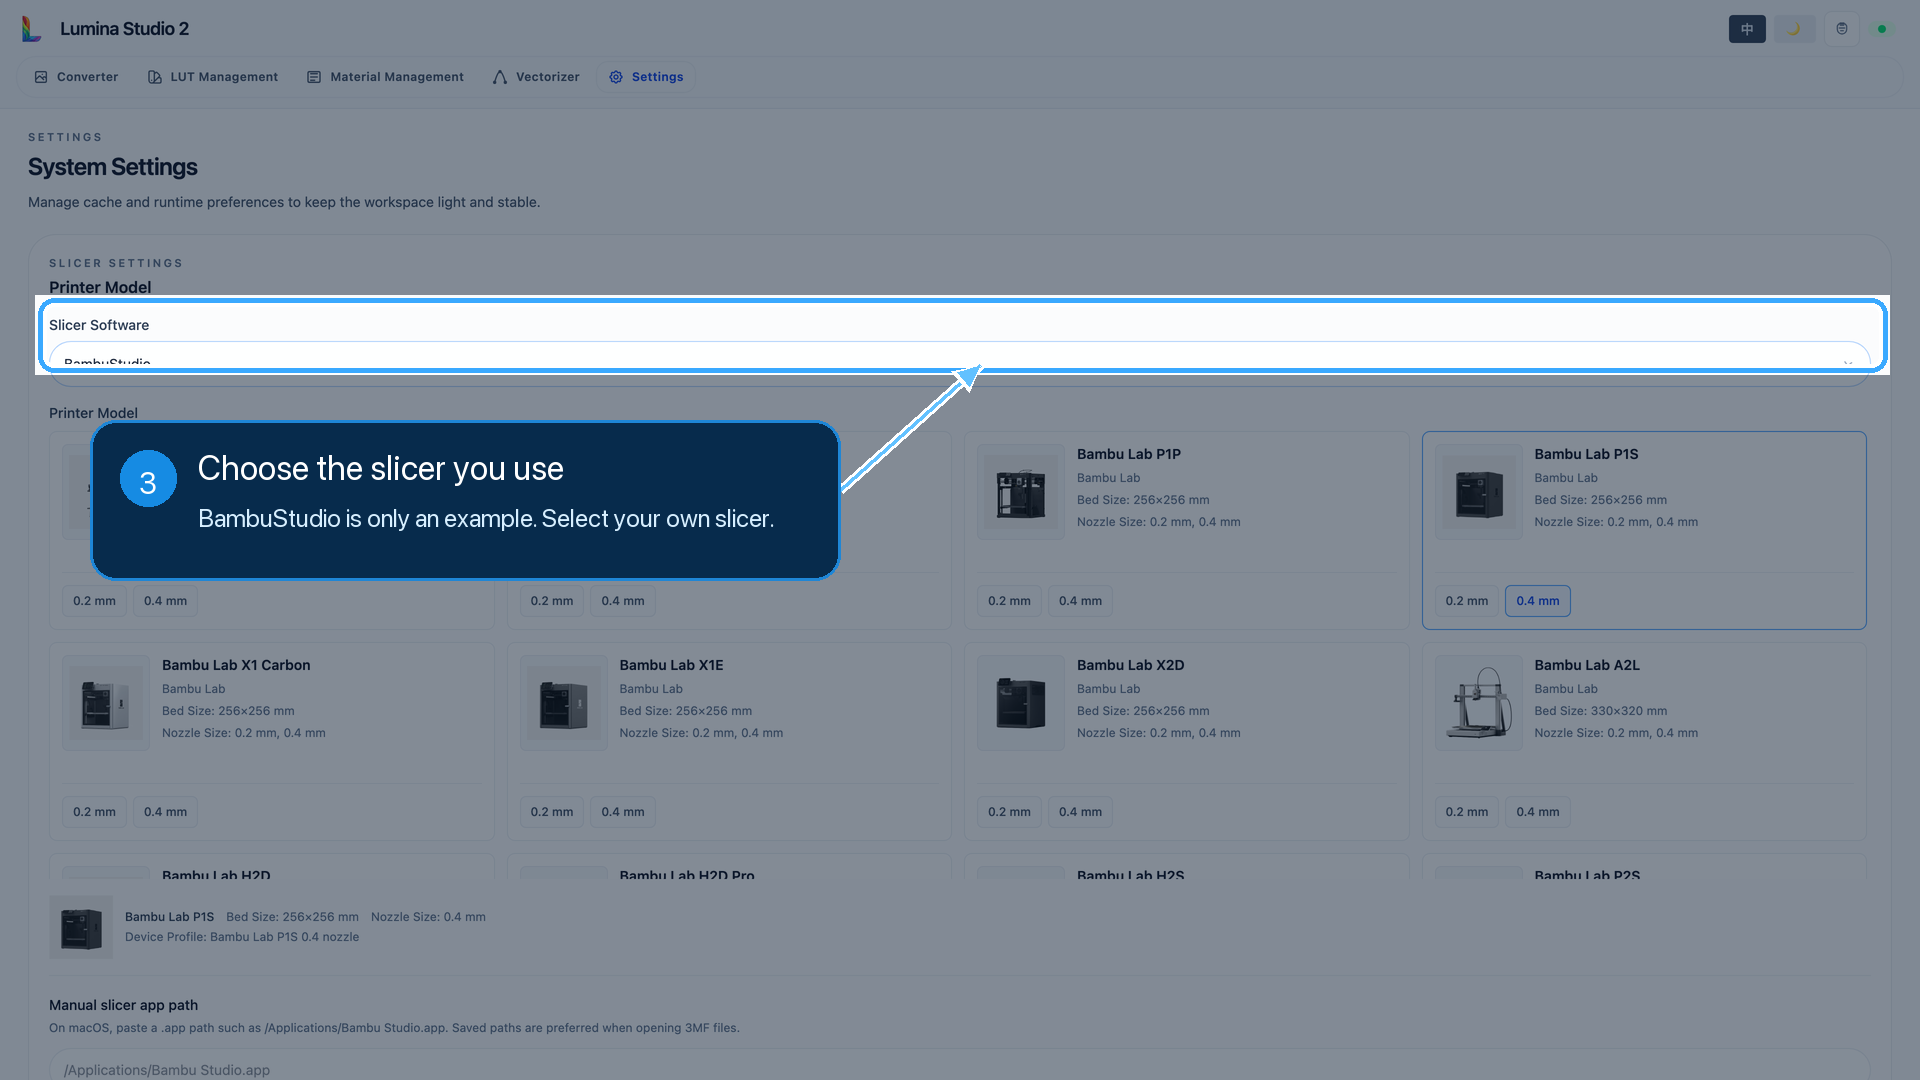
Choose the slicer you normally use. BambuStudio is selected in the example. If you use another supported slicer, choose that option instead.
Step 4: Select your printer model
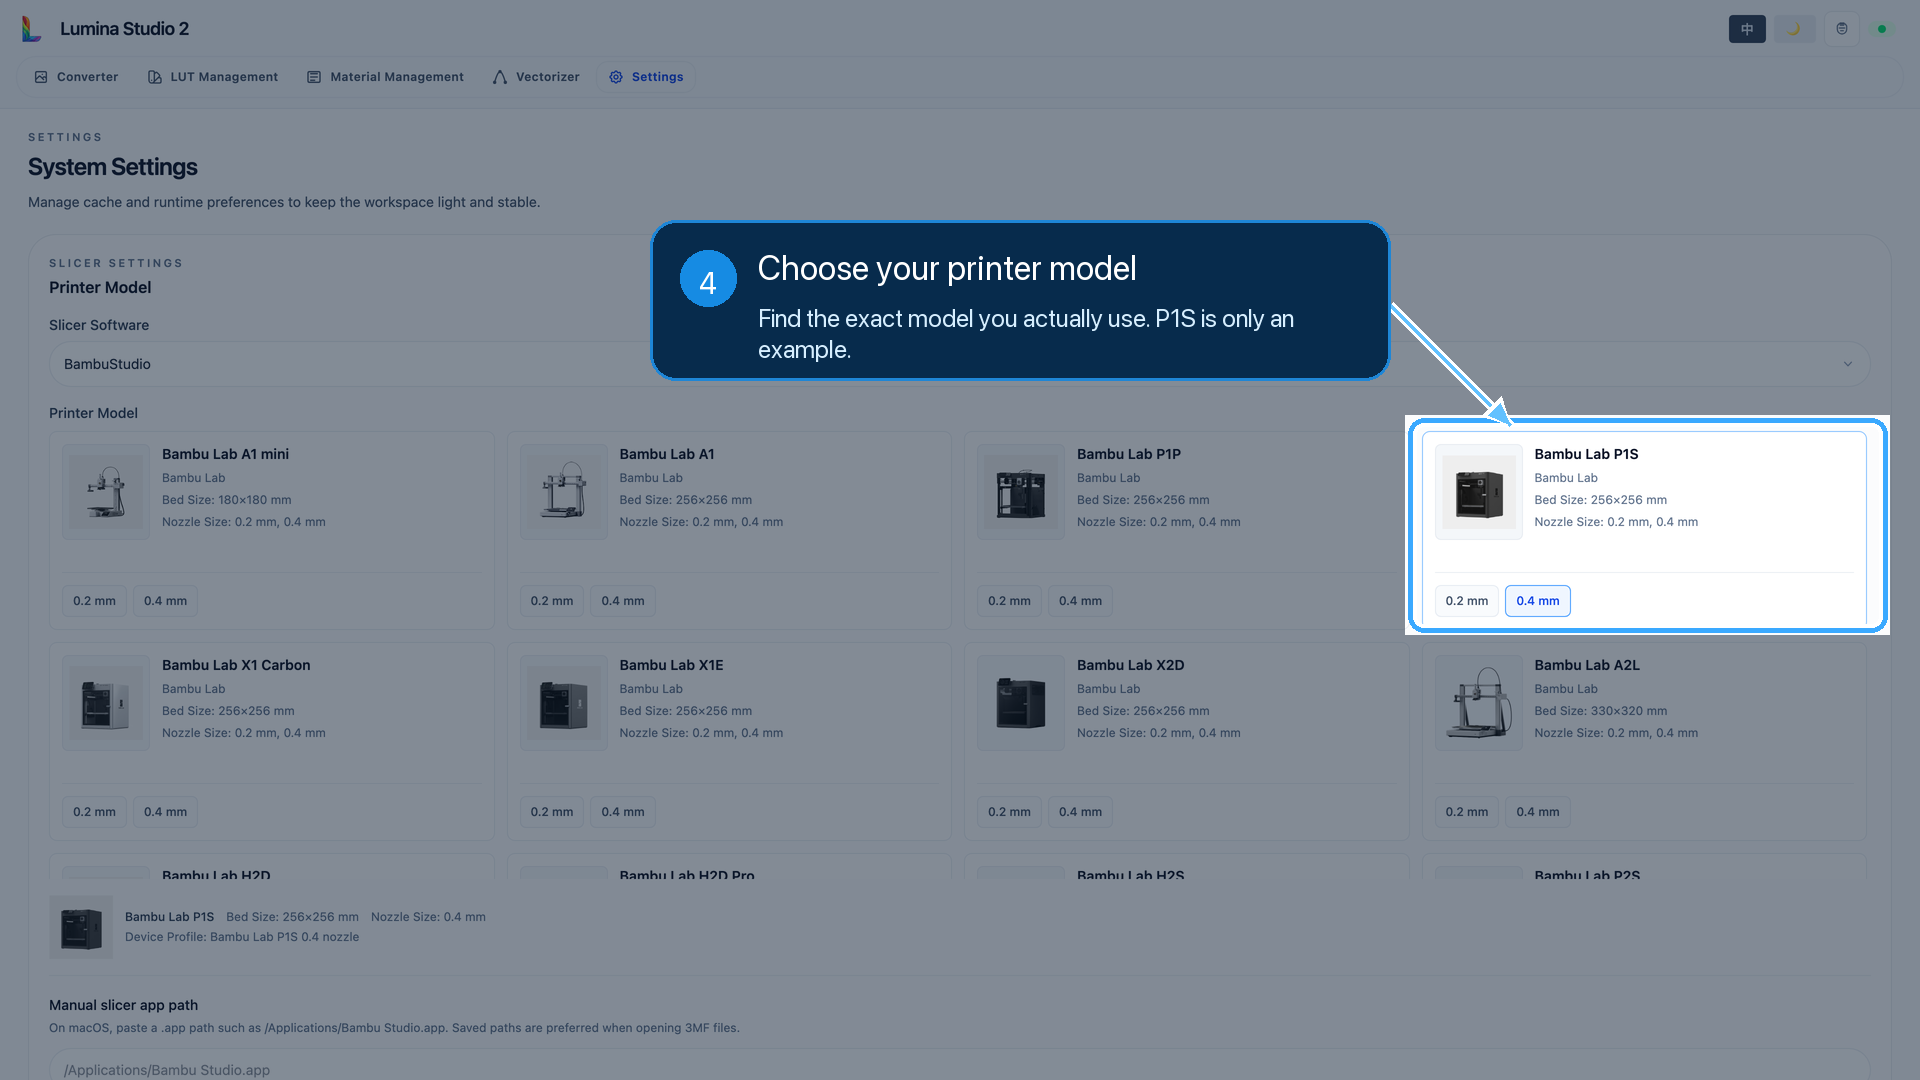
Find and select your actual printer in the printer list. Check the full model name instead of choosing by appearance alone.
The Bambu Lab P1S shown here is only an example. Select your own printer model.
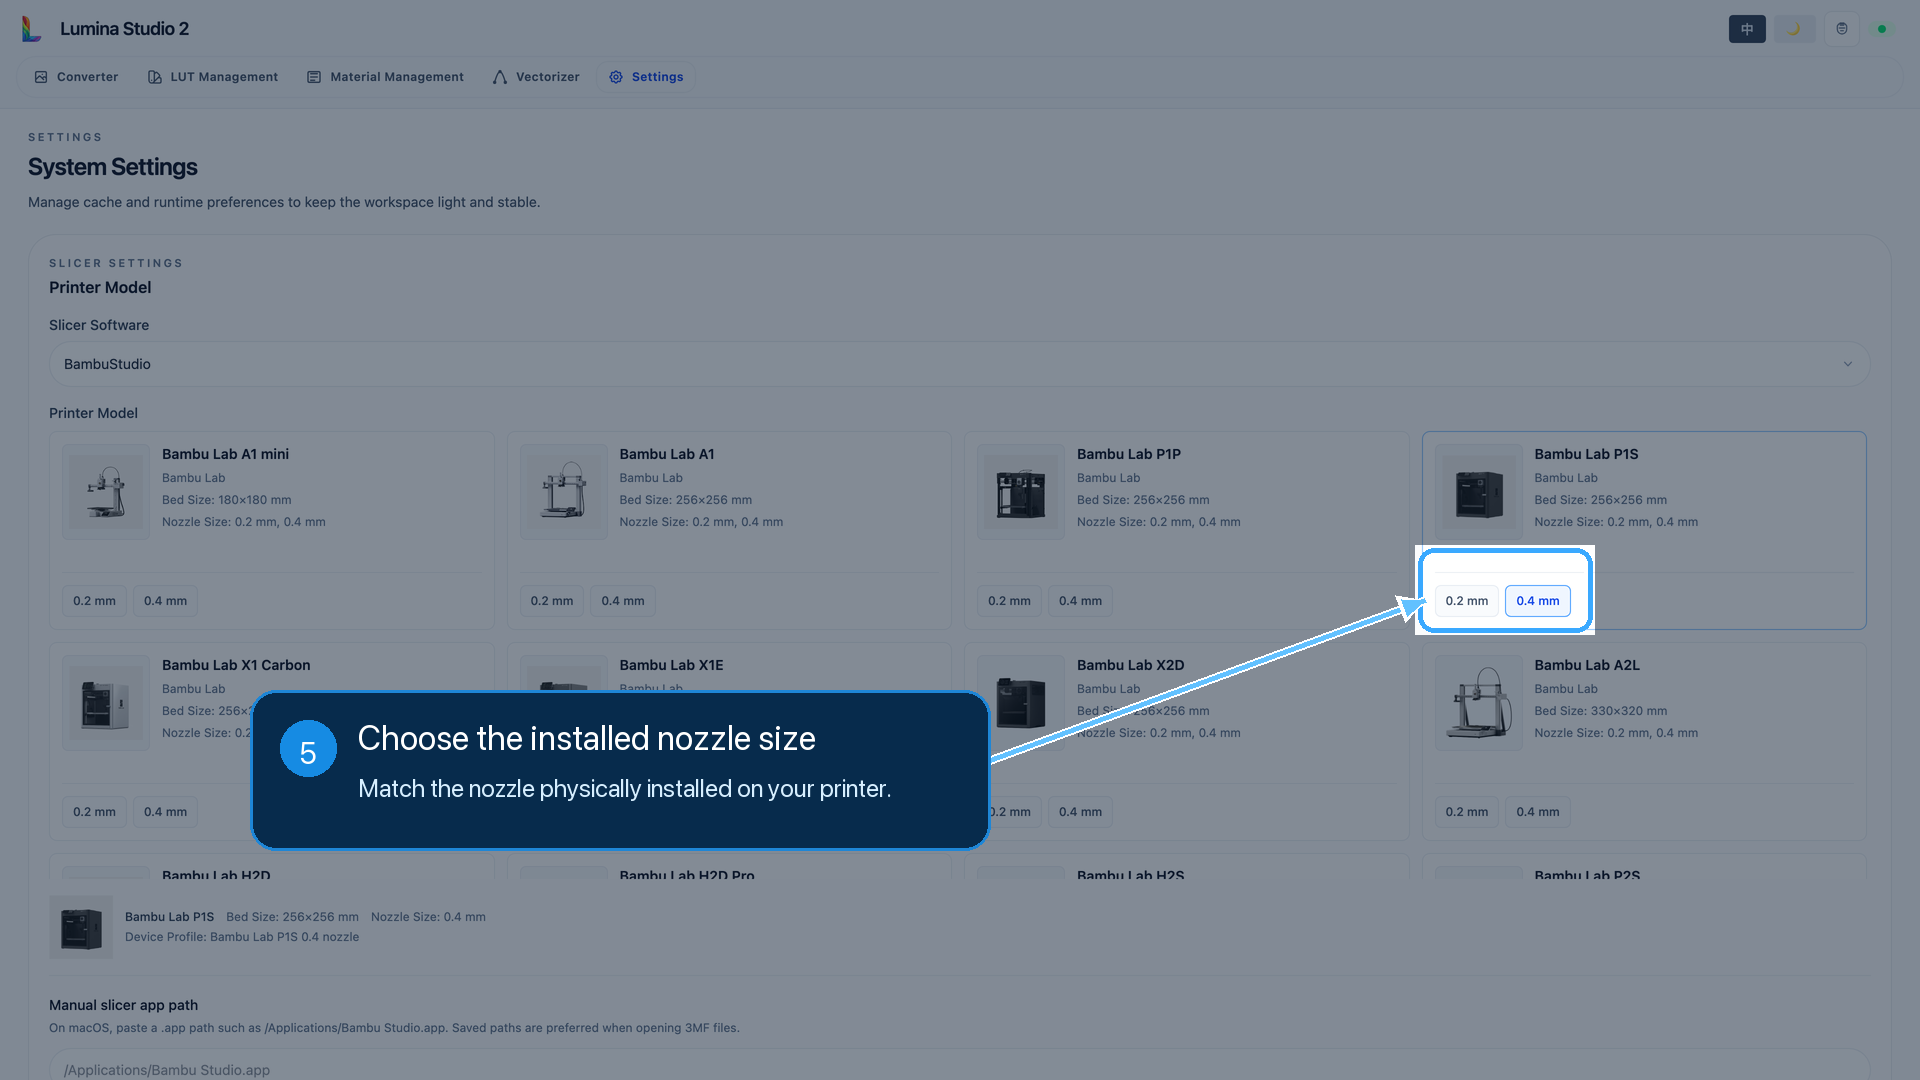
Step 5: Select the installed nozzle size
On the selected printer card, choose the nozzle size that is physically installed on the printer.
The nozzle setting must match the actual hardware. 0.4 mm is only the example shown here; choose a different size if that is what your printer uses.
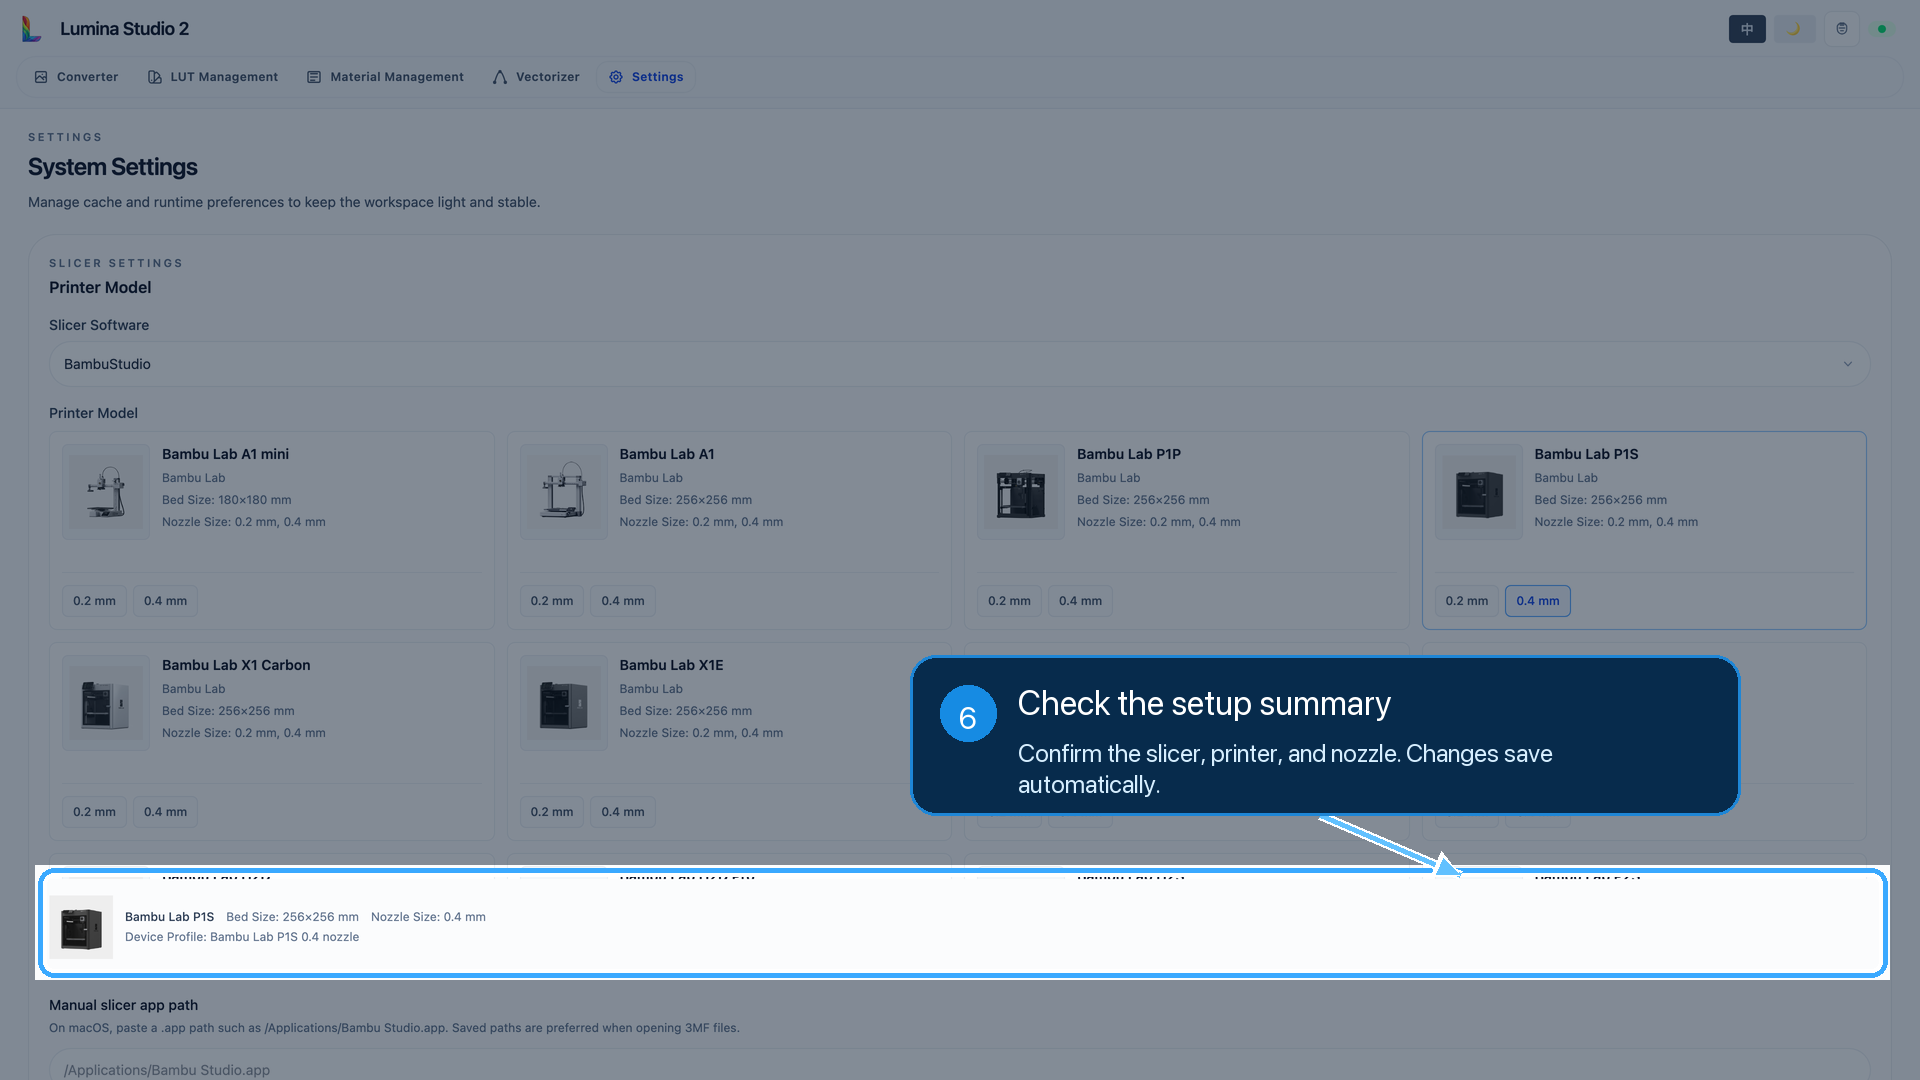
Step 6: Check the settings summary
Review the slicer, printer model, and nozzle size shown near the bottom of the page. Confirm that all three match your real setup.
Lumina Studio saves these settings automatically. There is no separate Save button.
After configuration
You can now return to the other Lumina Studio features. If you later change your slicer, printer, or nozzle, return to Settings and update the corresponding option.
Troubleshooting
What if my printer is not listed?
First, make sure you selected the correct slicer, because different slicers can expose different printer lists. If the model is still missing, check whether the current Lumina Studio version supports it.
What if I do not know my nozzle size?
Check the printer settings, nozzle packaging, or the marking on the nozzle itself. Do not guess based on the example.
Why is there no Save button?
This is expected. Lumina Studio saves the selection automatically.
Submit feedback
Your feedback is sent privately to the Wiki maintainers and is not displayed publicly on this page.